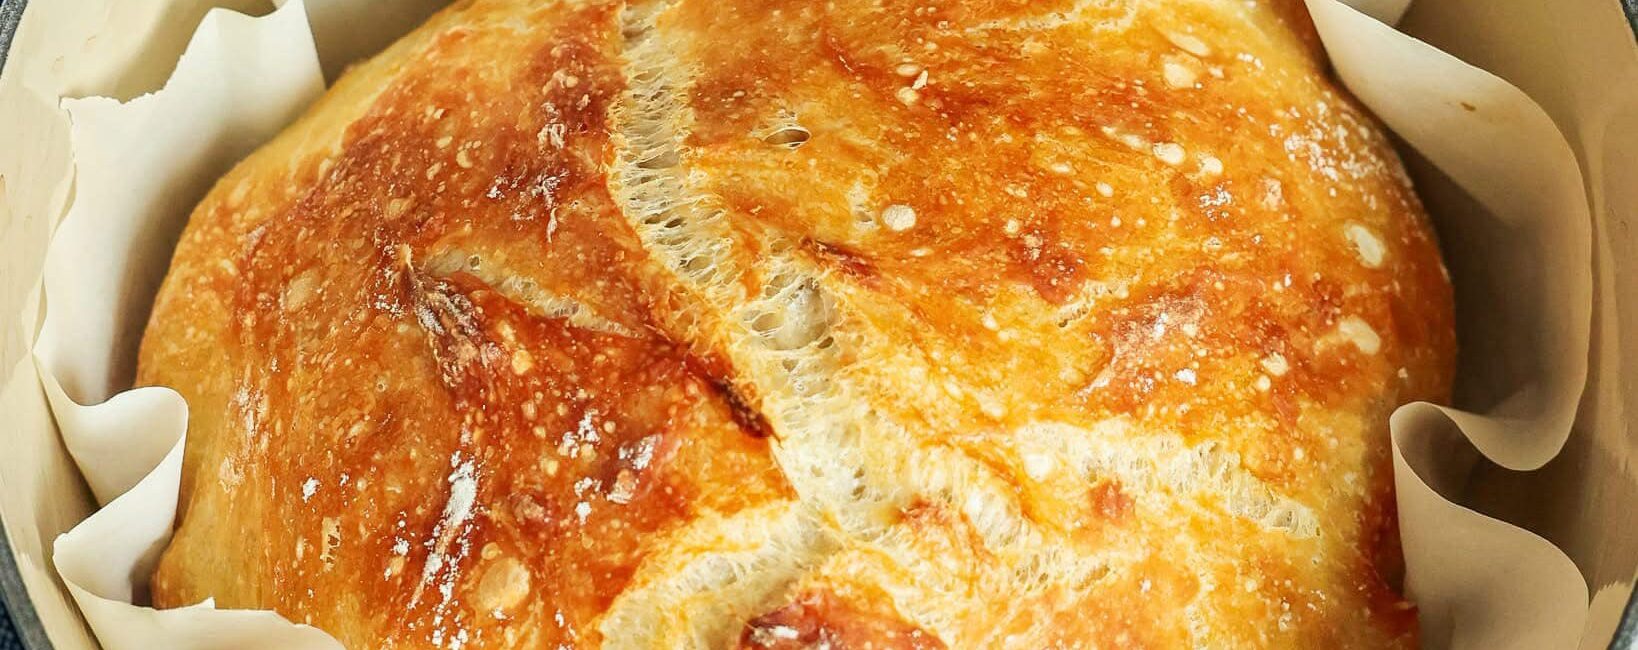
Baking bread from scratch can seem like an intimidating task, especially for those who are new to baking or don’t have the time or energy to go through the intricate processes of traditional bread-making. The good news is, there’s a way to enjoy the satisfaction and aroma of freshly baked bread with a simple and foolproof recipe. Enter the no-knead bread recipe—a genius approach to bread baking that yields a beautifully crusty, soft, and flavorful loaf, all with minimal effort and only four simple ingredients.
This no-knead bread recipe is designed for those who want the joy of homemade bread without the need for special techniques or equipment. You won’t need a stand mixer or any professional kneading skills. With just a few basic ingredients, this bread is incredibly easy to prepare. Let’s dive deep into this baking technique and explore why it’s the perfect choice for beginner bakers, busy home chefs, or anyone who loves the idea of homemade bread without the usual fuss.
The Beauty of No-Knead Bread
Why No-Knead Bread?
The concept of no-knead bread became popular in the early 2000s thanks to renowned baker Jim Lahey, who demonstrated how to make delicious, artisan-style bread without the traditional kneading step. The secret lies in time, patience, and the science behind the ingredients. By allowing the dough to rise slowly over an extended period, the yeast has plenty of time to develop flavor, resulting in a perfectly textured and flavorful loaf. This method eliminates the need for strenuous kneading and guarantees success for even the most inexperienced bakers.
The Advantages of No-Knead Bread
- Simple Ingredients: With only four ingredients, this bread recipe is as minimalist as it gets. You don’t need to gather fancy or hard-to-find ingredients, making this bread perfect for anyone with a basic pantry.
- No Kneading Required: One of the biggest barriers to bread-making is the kneading process, which can be time-consuming and tiring. No-knead bread eliminates that step entirely, making it incredibly beginner-friendly.
- Less Time Involved: While the dough does need time to rise (usually 12 to 18 hours), this is mostly hands-off time. You’ll be able to prepare the dough the night before and bake it the next day with minimal active effort.
- Rustic, Artisan Texture: The slow rise gives the bread a wonderful, chewy texture and a flavorful crust. It will look and taste like a rustic artisan loaf, even though it was made in your own kitchen with minimal effort.
- Versatility: You can customize your no-knead bread with different herbs, spices, or seeds, or even experiment with flours to create unique variations.
The Simple Ingredients You Need for No-Knead Bread
One of the most appealing aspects of no-knead bread is its simplicity. You only need four basic ingredients, most of which are likely already in your pantry:
- Flour: The main ingredient in any bread recipe is flour, and for no-knead bread, all-purpose flour works perfectly. If you want a slightly different texture, you can experiment with bread flour or whole wheat flour, but all-purpose flour is a great starting point.
- Water: The amount of water you use is essential for hydration, helping to activate the yeast and develop the dough. Room-temperature water works best, as it’s neither too hot nor too cold.
- Salt: Salt isn’t just for flavor; it also regulates the yeast activity and strengthens the dough. A small amount of salt will help balance the bread’s overall flavor profile.
- Yeast: For this recipe, instant yeast is the go-to choice. Instant yeast is easy to use because it doesn’t need to be proofed in warm water, and it’s fast-acting. Active dry yeast can also work, but it might need to be proofed first.
Optional Ingredients to Customize Your Bread
While the basic no-knead bread recipe only requires the four ingredients listed above, you can get creative with add-ins to give your bread extra flavor and texture. Some popular variations include:
- Herbs: Fresh or dried herbs like rosemary, thyme, or oregano can be added for a fragrant, savory touch.
- Seeds: Sunflower seeds, sesame seeds, or poppy seeds can be incorporated into the dough or sprinkled on top before baking for extra crunch and visual appeal.
- Sweet Additions: If you’re looking for a sweeter loaf, consider adding a spoonful of honey or sugar to the dough, or fold in dried fruits like raisins or cranberries.
- Olives or Cheese: Adding olives, sun-dried tomatoes, or cheese (like cheddar or parmesan) can give the bread a more Mediterranean flavor.
The Step-by-Step Process to Make No-Knead Bread
Step 1: Mix the Ingredients
In a large mixing bowl, combine 3 cups of all-purpose flour, 1 and 1/4 teaspoons of salt, 1/4 teaspoon of instant yeast, and 1 and 1/2 cups of water. Stir everything together with a spoon or your hands until the mixture forms a rough dough. You don’t need to knead it—just ensure that all the flour is hydrated and the dough comes together.
Step 2: Let the Dough Rise
Cover the bowl with plastic wrap or a damp towel. Allow the dough to rise at room temperature for 12 to 18 hours. This long fermentation process is what allows the yeast to develop a rich, complex flavor, and it also helps create the signature airy and chewy texture in the bread. After 12 hours, the dough should be bubbly, soft, and slightly sticky. It might also have small bubbles or a slightly fermented smell, which indicates that the yeast has done its job.
Step 3: Preheat the Oven and Prepare the Dutch Oven
About 30 minutes before you’re ready to bake, place a Dutch oven (or any oven-safe, heavy pot with a lid) in the oven and preheat it to 450°F (230°C). The Dutch oven will create a steam environment that mimics the conditions of a traditional bread oven, resulting in a crispy, golden crust.
Step 4: Shape the Dough
Once the dough has finished rising, turn it out onto a well-floured surface. Since this dough is a bit sticky, lightly flour your hands and gently shape the dough into a round loaf. You don’t need to be perfect—just fold the dough over itself a few times to form a rough ball. If desired, you can sprinkle the top of the loaf with a bit of flour or seeds before baking.
Step 5: Bake the Bread
Carefully remove the preheated Dutch oven from the oven and place the dough inside. Cover the pot with the lid and bake for 30 minutes. After 30 minutes, remove the lid and bake for an additional 10-15 minutes until the bread has a deep golden-brown crust.
Step 6: Cool the Bread
Once the bread is baked, carefully remove it from the Dutch oven and transfer it to a cooling rack. Let it cool for at least 30 minutes before slicing. This resting time allows the bread’s structure to set, ensuring the perfect texture when you cut into it.
Tips for Perfecting Your No-Knead Bread
While this recipe is incredibly forgiving, there are a few tips to help you achieve the best possible loaf:
- Measure Your Flour Correctly: Flour can be easily over-measured, leading to a dry loaf. Always use the spoon-and-level method to measure flour, or invest in a kitchen scale to weigh the flour (about 375 grams for 3 cups).
- Don’t Rush the Rising Time: The slow fermentation process is key to developing the flavor and texture of the bread. Although it’s tempting to bake it sooner, giving the dough plenty of time to rise will yield the best results.
- Use a Dutch Oven for the Best Crust: A heavy pot with a lid (like a Dutch oven) traps steam inside, which creates the signature crackling crust. If you don’t have a Dutch oven, you can use a heavy casserole dish or another covered oven-safe pot, but the result might not be quite as crusty.
- Experiment with Flour Types: While this recipe uses all-purpose flour, feel free to experiment with bread flour or whole wheat flour. These will alter the texture and flavor of the bread slightly, but the no-knead method will still work well.
- Make It Your Own: Once you get comfortable with the basic recipe, try adding different ingredients to make the bread your own. You can experiment with different herbs, spices, or cheeses to add a personal touch to your homemade loaves.
Conclusion: The Magic of No-Knead Bread
Making bread doesn’t have to be a complex, time-consuming process. With just four simple ingredients and a little bit of patience, anyone can bake a beautiful loaf of no-knead bread at home. This method is perfect for beginner bakers, busy individuals, or anyone who loves the idea of homemade bread without the usual fuss.
Whether you enjoy it as a side for soup, a base for sandwiches, or just with a pat of butter, no-knead bread will quickly become a go-to recipe in your kitchen. So grab your flour, yeast, and a few simple tools, and let the magic of no-knead bread begin!


