In a large bowl, whisk together the flour, salt, and sugar. The sugar adds a touch of sweetness without overpowering the filling.
2. Cutting in the Butter
Add the cold butter cubes. Using a pastry cutter, two knives, or your fingertips, work the butter into the flour until the mixture resembles coarse crumbs with some pea‑sized bits of butter remaining. These butter pockets create flaky layers when baked.
3. Adding Ice‑Cold Water
Sprinkle 1 Tbsp of ice water over the flour mixture, tossing gently with a fork. Continue adding water, one tablespoon at a time, until the dough just holds together when pinched—avoid adding too much water.
4. Forming and Chilling
Gather the shaggy dough into a disk, wrap in plastic, and refrigerate for at least 1 hour (or up to 2 days). This rest period relaxes gluten and chills the butter, yielding a tender, flaky crust.
5. Rolling Out
On a lightly floured surface, roll the dough into a 12‑inch (30 cm) circle, about 3 mm thick. Rotate and flour as needed to prevent sticking.
6. Fitting the Dough
Gently transfer the dough to your pie dish by rolling it around your rolling pin. Press the dough into the dish’s bottom and sides, trim excess to a 2 cm overhang, then fold under and crimp for a decorative edge.
7. Second Chill
Refrigerate the unbaked shell for 30 minutes to prevent shrinkage when baking.
Blind‑Baking the Crust
- Preheat oven to 190 °C (375 °F).
- Line and weight: Place parchment or foil over the crust and fill with pie weights or dried beans.
- First bake 15 minutes.
- Remove weights and parchment, bake 5–7 minutes more until edges turn light golden.
- Cool on a rack. The lightly baked shell keeps the bottom crisp once filled.
Preparing the Coconut Custard Filling
1. Heat the Milks
In a medium saucepan, whisk together the coconut milk, whole milk, and sugar. Warm over medium heat until sugar dissolves and mixture just begins to steam—avoid reaching a full boil.
2. Thicken with Cornstarch
In a separate bowl, whisk cornstarch into 2 Tbsp of the warm milk to create a smooth slurry. Pour it back into the saucepan, whisking constantly, until the custard thickens and coats the back of a spoon (3–5 minutes).
3. Temper the Egg Yolks
Place yolks in a heatproof bowl. Slowly whisk in a ladleful of hot custard to temper the yolks. Then return the tempered yolks to the saucepan, whisking continuously to prevent curdling.
4. Finish Cooking
Cook an additional 1–2 minutes on low heat until very thick and glossy. Do not let the mixture boil rapidly.
5. Flavor and Fold in Coconut
Remove from heat; stir in vanilla extract and shredded coconut. The custard should be silky with visible coconut flecks.
6. Fill the Shell
Pour the hot custard into the warm blind‑baked crust, smoothing the surface. Press plastic wrap directly on the custard to prevent a skin from forming. Chill 2 hours (or overnight) until fully set.
Mastering Italian Meringue
Italian meringue is the most stable type, made by beating a hot sugar syrup into whipped egg whites.
1. Prepare the Sugar Syrup
Combine the sugar and water in a small saucepan. Heat over medium without stirring until the mixture reaches 118 °C (244 °F) on a candy thermometer (soft‑ball stage). Swirl the pan gently if crystals form on the sides.
2. Whip the Egg Whites
While the syrup heats, beat the egg whites and cream of tartar in a stand mixer at medium speed until soft peaks form.
3. Combine Syrup and Whites
With the mixer on medium‑high, slowly pour the hot syrup down the side of the bowl in a thin stream. Continue beating until the meringue is glossy, forms stiff peaks, and the bowl feels neutral to the touch (10–12 minutes).
Assembling & Browning the Pie
- Meringue application: Spread or pipe the meringue over the chilled coconut filling, ensuring the meringue seals to the crust edge to prevent weeping.
- Decorative peaks: Form peaks or swirls with an offset spatula for a classic look.
- Browning:
- Torch method: Gently caramelize the peaks with a kitchen torch, moving evenly to golden tips.
- Broiler method: Place under a hot broiler 1–2 minutes, watching constantly to prevent scorching.
- Serve or chill: You may serve immediately at room temperature or chill 15 minutes to firm the meringue.
Troubleshooting Common Issues
- Weeping Meringue: Ensure custard is fully chilled, seal meringue edges, and avoid humidity.
- Dense Meringue: Syrup too hot or poured too quickly—maintain 118 °C and drizzle slowly.
- Grainy Custard: Overcooking or insufficient whisking—cook gently, whisk constantly.
- Soggy Crust: Blind‑bake thoroughly, cool crust slightly before filling, avoid hot custard directly into a cold shell.
Easter Variations & Presentation Ideas
- Mini Meringue Nests: Pipe individual nests on each slice and fill with pastel candy eggs.
- Colored Meringue Swirls: Tint portions of meringue with natural food colors (pink, green) for Easter pastels.
- Edible Flowers: Garnish with candied violets or marigold petals for spring flair.
- Coconut Caramel Drizzle: Warm a coconut‑based caramel and lightly drizzle around the plate rim.
Serving & Pairing Suggestions
- Temperature: Serve slightly chilled (10–15 °C) for best texture.
- Beverage pairing: Moscato d’Asti, sweet Riesling, or a delicate jasmine tea complement the coconut notes.
- Garnishes: Fresh berries, mint sprigs, or lime zest add brightness.
- Cutting tip: Use a hot, wet knife for clean slices; wipe blade between cuts.
Make‑Ahead, Storage & Leftovers
- Make‑ahead: Prepare crust and custard up to 1 day in advance; assemble meringue just before serving.
- Storage: Cover and refrigerate 24 hours max—meringue may weep if stored longer.
- Freezing: Not recommended; both meringue and custard lose quality when frozen.
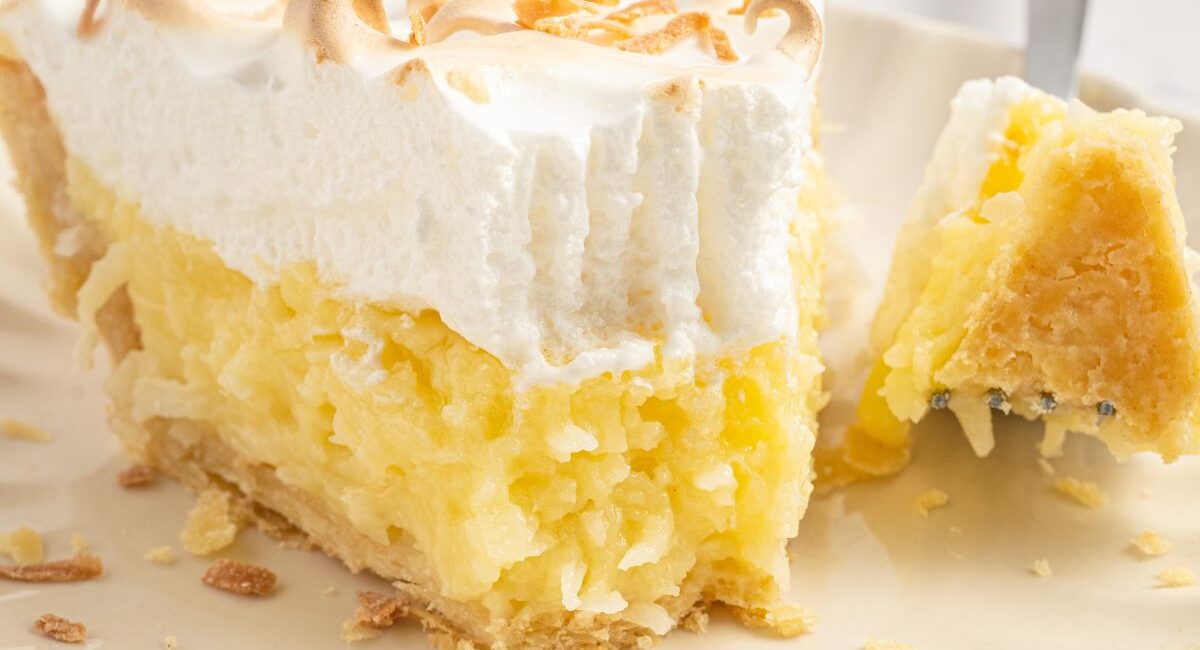
Coconut Meringue Pie brings together the creamy indulgence of coconut custard and the ethereal beauty of Italian meringue. With the right ingredients, careful technique, and these detailed tips, you’ll create a show‑stopping Easter centerpiece that delights both the eyes and the palate. Enjoy every luscious bite!