Step 5: Plant the Cloves
- Plant cloves with the pointed end up and root end down.
- Space cloves about 4-6 inches apart in rows or evenly spaced in containers.
- Plant at a depth about 2 inches deep, covering with soil.
- Mulch with straw, shredded leaves, or compost to retain moisture and protect from frost.
Step 6: Water and Care
- Keep soil consistently moist but not soggy.
- Water deeply once or twice a week depending on rainfall.
- Garlic dislikes “wet feet” — soggy soil can cause bulb rot.
- Fertilize with a balanced organic fertilizer or fish emulsion every 4-6 weeks during the growing season.
Step 7: Weed Management
- Keep the garlic bed or container free from weeds which compete for nutrients.
- Mulching helps suppress weeds naturally.
Step 8: Monitor for Pests and Diseases
- Garlic is naturally pest-resistant but watch out for:
- Onion thrips — small insects that can damage leaves.
- White rot — a fungal disease, avoid by crop rotation.
- Nematodes — microscopic worms that can stunt growth.
- If you spot issues, use organic remedies like neem oil, insecticidal soap, or crop rotation.
Step 9: Scape Removal (Hardneck Garlic Only)
- In late spring or early summer, hardneck garlic will produce flower stalks called scapes.
- Remove these scapes once they curl to encourage the plant to put energy into bulb growth.
- Scapes are edible and delicious — sauté, grill, or pickle them!
Step 10: Harvesting Garlic
- Garlic is usually ready to harvest in mid to late summer.
- Signs your garlic is ready:
- Lower leaves turn brown and dry, while upper leaves remain green.
- Bulbs have formed and feel firm.
- Carefully loosen the soil and gently lift bulbs with a garden fork or hand tool.
- Avoid pulling by the stalk to prevent damaging bulbs.
Step 11: Curing and Storage
- After harvesting, brush off excess soil but don’t wash bulbs.
- Cure garlic in a dry, airy, shaded place for 2-3 weeks until skins are papery and necks are dry.
- Trim roots and cut stalks about 1 inch above bulbs (if softneck, you can braid).
- Store garlic in a cool, dry place with good airflow.
- Properly cured garlic can last 6-9 months or longer.
Tips for Growing Big Garlic Bulbs: Secrets to Success
- Start with large cloves: Bigger cloves produce bigger bulbs.
- Plant early: Give cloves enough time to develop roots before winter.
- Fertilize: Garlic is a heavy feeder; organic nitrogen-rich fertilizers help.
- Control moisture: Keep soil moist but well-drained.
- Remove scapes: For hardneck types, scape removal redirects energy to bulb.
- Rotate crops: Avoid planting garlic where onions, leeks, or garlic grew recently to prevent disease.
- Mulch well: Protects soil moisture and temperature.
- Avoid overcrowding: Space cloves properly to allow bulbs room to grow.
Common Problems and How to Fix Them
| Problem | Symptoms | Solution |
|---|---|---|
| Yellowing leaves | Overwatering or nutrient deficiency | Adjust watering, add fertilizer |
| Stunted growth | Poor soil, pests, or lack of nutrients | Improve soil, check for pests |
| Soft, rotten bulbs | Overwatering or fungal infection | Improve drainage, avoid soggy soil |
| Scrawny bulbs | Late planting or overcrowding | Plant earlier, space cloves further |
| Leaf spots | Fungal or bacterial disease | Remove affected leaves, improve airflow |
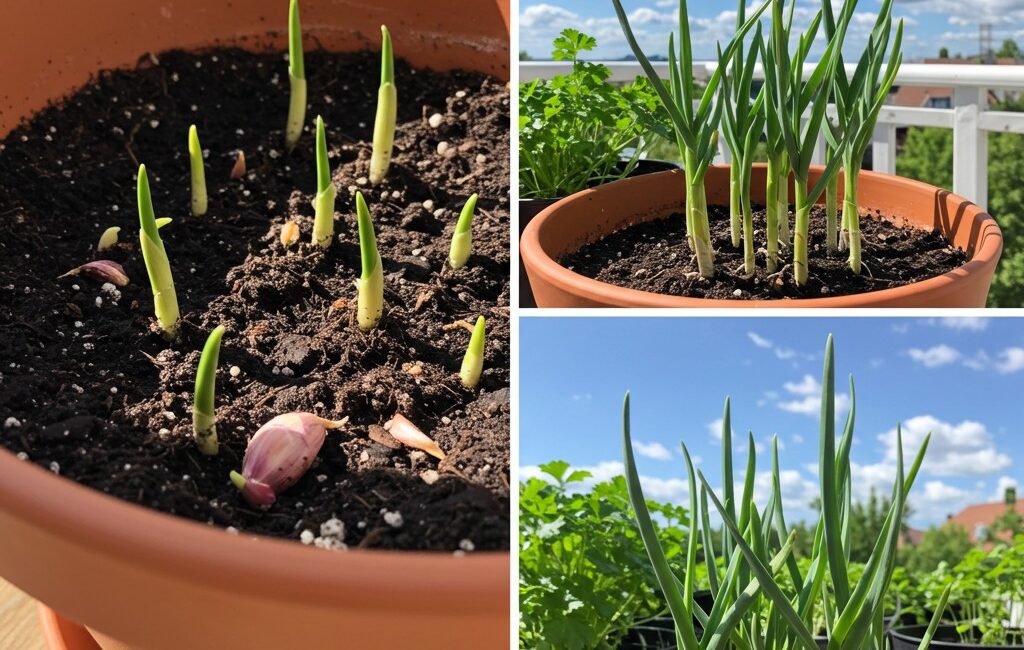
Growing Garlic in Containers: A Step-by-Step Guide
If you lack garden space, no worries! Garlic thrives in containers.
Container Size and Type
- Use a pot or grow bag at least 10-12 inches deep and wide enough for several cloves spaced 4-6 inches apart.
- Ensure good drainage holes.
Soil Mix
- Use high-quality potting mix rich in organic matter.
- Avoid heavy garden soil which compacts in containers.
Planting and Care
- Plant cloves 2 inches deep.
- Keep container in a sunny spot.
- Water regularly, allowing soil surface to dry slightly between watering.
- Fertilize with diluted organic fertilizer monthly.
Benefits
- Easier to manage soil conditions.
- Mobility: you can move the container for ideal sunlight or indoors during harsh weather.
FAQs About Growing Garlic at Home
Q: How long does garlic take to grow?
A: Typically 6-8 months from planting to harvest, depending on variety and climate.
Q: Can I plant grocery store garlic?
A: It’s possible, but often treated to prevent sprouting and can carry diseases. Better to buy seed garlic.
Q: How do I know when to harvest?
A: When lower leaves turn brown but some upper leaves are still green.
Q: Can I save cloves from my own garlic bulbs?
A: Yes, but keep in mind disease risk. Use healthy bulbs only.
Q: What’s the difference between hardneck and softneck garlic?
A: Hardneck produces scapes and grows better in cold climates; softneck stores longer and grows well in mild climates.
Conclusion
Growing big garlic bulbs at home is entirely doable — even if you have limited space or are a beginner gardener. With a little planning, patience, and care, you can enjoy a bountiful harvest of fresh, flavorful garlic that outshines anything from the store. This easy method works for containers or garden beds and fits perfectly into busy lifestyles.
So, grab some quality seed garlic this fall, follow these steps, and get ready to taste the satisfaction of growing your own garlic — delicious, healthy, and homegrown!