Orchids are celebrated for their delicate elegance, stunning blooms, and, at times, frustratingly finicky nature. When your orchid hits crisis mode—roots rotting, leaves wilting, and hope fading—don’t panic. You can actually revive a rootless, nearly-leafless orchid in just ten days using only rice water. Yes, the everyday kitchen staple that’s rich in nutrients, vitamins, and natural plant boosters.
In this expanded, step‑by‑step guide, you’ll discover:
- Why root rot happens and how to diagnose severe orchid distress
- How rice water unlocks astonishing regenerative power
- A day‑by‑day protocol for nurturing new roots, leaves, and vigor
- Expert tips on pruning, sterilizing, and long‑term orchid health
- Secrets for optimal growth, humidity control, and pest prevention
Let’s dig in and breathe new life into your orchid—even if it seems beyond hope.
Table of Contents
- 🌱 Understanding Orchid Root Rot & Leaf Softening
- Step 1: Preparing the Orchid for Revival (Pruning & Cleaning)
- Step 2: Preparing Nutrient‑Rich Rice Water
- Step 3: Applying Rice Water to Leaves and Stem
- Step 4: The 10‑Day Rescue Protocol
- Days 1‑3: Stimulate Root Initiation
- Days 4‑7: Encourage Leaf and Root Growth
- Days 8‑10: Strengthen the New Plant
- Step 5: Post‑Recovery Care & Repotting
- Pro Tips for Long‑Term Orchid Health
- FAQs: Common Concerns Answered
- Troubleshooting Common Issues
- Why This Works: Science Behind Rice Water Revival
1. 🌱 Understanding Orchid Root Rot & Leaf Softening
Before launching into recovery, you need to recognize the signs of orchid distress:
- Rotting roots: Mushy, brown, or black, and often emitting a foul smell
- Severe root loss: Only a few healthy roots—or none—remain
- Soft, faded leaves: Limp, pale, and devoid of firmness
- Stem discoloration: Stems turning yellow, brown, or translucent
When an orchid reaches this critical state, its energy systems are collapsing. But orchids are surprisingly resilient—if given the right conditions and stimulation, they can regenerate new roots and leaves rapidly.
Why Rice Water?
Rice water—time‑tested in organic gardening, hair care, and plant propagation—offers:
- Vitamins: B complex and vitamin E
- Minerals: Potassium, phosphorus, magnesium
- Starch: Mild chelating agent aiding nutrient uptake
- Natural antibacterial enzymes
This nutrient blend supports cellular healing, root initiation, and growth—making rice water an ideal solution for rescuing ailing orchids.
2. Step 1: Preparing the Orchid for Revival
2.1. Pruning Damaged Roots & Stem
- Sanitize your tools: Use 70% isopropyl alcohol or boiling water to sterilize sharp scissors or pruning shears.
- Remove rotting parts: Clip any black, mushy roots and soften stem tissue down to healthy white or green tissue.
- Trim large leaves if needed: If a large leaf is draining the orchid’s resources, it’s best to remove it to direct energy toward regeneration.
This “prune-and-focus” technique helps the orchid direct its scarce energy into regrowing new roots and leaves rather than sustaining decaying tissue.
2.2. Clean the Orchid Thoroughly
- Rinse the plant under room-temperature, clean running water to wash off pathogens, old media, and debris.
- Handle gently—roots are fragile at this stage.
- After rinsing, place the orchid on a clean paper towel or away from direct sunlight to air‑dry thoroughly. Any residual moisture can worsen rot.
3. Step 2: Preparing Nutrient‑Rich Rice Water
Why Rice Water Works Wonders
Starch, vitamins B, phosphorus, trace minerals, and enzymes combine in rice water to create an effective nutrient solution that rivals many chemical fertilizers—without the side effects.
How to Prepare It
- Measure 2 tablespoons of uncooked rice (white, brown, basmati, jasmine—any kind works).
- Place rice in a small bowl, add 240 ml (1 cup) of clean water.
- Soak for 30 minutes, stirring intermittently.
- Drain off the cloudy rice water—this is your nutrient-rich elixir.
Discard the rice or cook it—no reuse necessary.
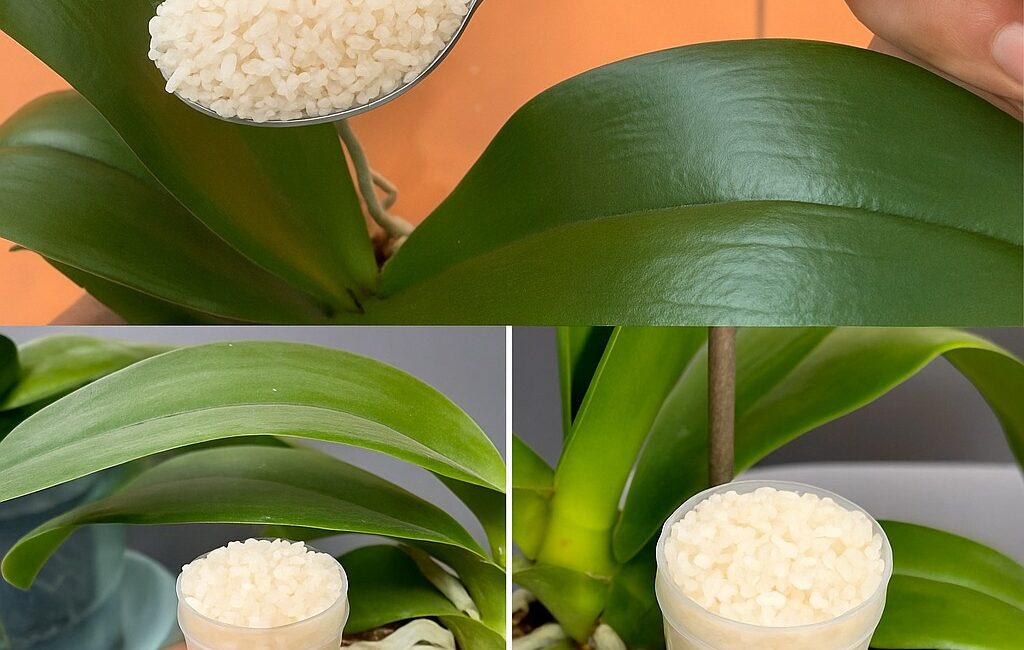
4. Step 3: Applying Rice Water to Leaves and Stem
4.1. Leaf & Stem Application
- Soak a cotton ball or soft cloth in the rice water.
- Gently wipe both sides of each remaining leaf, stem, and any exposed crown tissue.
- This process imparts nutrients and acts as a natural disinfectant, removing pathogens and promoting healing.
4.2. Basal Soak (Optional)
For orchids with a partially intact root base, consider a light basal soak:
- Place the orchid’s base in a shallow container with rice water—just enough to cover the root stump.
- Soak for 5–10 minutes, then remove and allow to air dry before returning to its stand.
5. Step 4: The 10‑Day Rescue Protocol
Follow this day-by-day regimen to guide your orchid from crisis to vigor.
📅 Days 1–3: Stimulate Root Initiation
- Day 1: After cleaning and prepping, apply rice water via cotton ball. Place the orchid in a warm (~24°C/75°F), humid area but out of direct sunlight.
- Day 2: Reapply rice water to stems and crown. Mist gently with distilled or filtered water in the evening to maintain humidity.
- Day 3: Repeat rice water treatment. By now, you may notice the plant turgidity improves, and tiny white root nubs may form at the base.
📅 Days 4–7: Encourage Root & Leaf Growth
- Continue daily rice water applications on the crown and stems.
- Mist mid-day to maintain moisture without waterlogging.
- Watch for root emergence—even thin, white projections signal regeneration.
- If new leaves begin to show signs of growth (firmer texture, slight greening), continue nurturing.
📅 Days 8–10: Strengthen the New Plant
- Daily rice water treatments, plus light misting.
- Roots may now reach 1–2 cm in length.
- Leaves may regain vigor.
- Optional: Introduce a mild orchid-strength fertilizer at one-quarter strength if roots exceed 2 cm. Otherwise, rice water alone is adequate.
By Day 10, expect a plant with multiple healthy new roots and stronger leaves, well on its way to recovery.
6. Step 5: Post‑Recovery Care & Repotting
6.1. Deciding When to Repot
Once your orchid sports at least 3–5 healthy roots (3–5 cm long, firm and green), it’s ready for repotting.
6.2. Best Medium to Use
- Mix coarse fir bark, charcoal, and a small amount of sphagnum moss.
- Alternatively, use a specialty orchid bark mix for convenience.
6.3. Repotting Steps
- Gently remove the orchid from any temporary medium.
- Slightly unwind and fluff new roots—avoid bending.
- Center the plant in a new pot (with excellent drainage).
- Fill around roots, tapping gently to secure the orchid without compressing.
- Water lightly, allowing excess to flow out.
- Position in bright, indirect light (~1–2 m from a south or east window) and maintain moderate humidity (~50‑60%).
7. Pro Tips for Long‑Term Orchid Success
Keep your revival successful with these essential orchid maintenance strategies:
7.1. Watering Habits
- Use distilled or low-mineral water.
- Water only when the potting media is dry—typically every 5–10 days.
7.2. Ideal Light & Temperature
- Bright, diffused light (~2,000–3,000 lux).
- Daytime temps: 22–28 °C (72–82 °F); Night: 16–18 °C (61–64 °F).
7.3. Humidity
- 50–70% relative humidity.
- Use a humidity tray or room humidifier—not direct misting, which can foster rot.
7.4. Feeding Routine
- Standard orchid fertilizer (20‑20‑20 or specialty bloom formula): quarter strength every 2 weeks.
- During recovery, stick to rice water only—no chemical fertilizer until roots establish.
7.5. Airflow
- Provide gentle airflow (ceiling fan on low or open window) to prevent stagnant moisture.
7.6. Pest & Disease Watch
Click page 2 for more