Orchids have long captivated plant enthusiasts with their exquisite, delicate blooms and exotic allure. However, many gardeners find cultivating these beautiful plants challenging due to their specific environmental needs and slow growth rates. What if there was a proven method to accelerate orchid rooting and ensure vibrant, long-lasting blooms? Enter the Steam Cultivation Technique—a revolutionary approach that mimics the orchid’s natural tropical habitat to promote faster root development and healthier growth.
In this comprehensive guide, we’ll explore every detail of the steam method, from creating humid environments to natural care with garlic solutions. Whether you’re a beginner or an experienced grower, these practical tips and scientifically-backed strategies will help you nurture orchids that flourish quickly and bloom spectacularly.
Understanding the Orchid’s Natural Habitat: Why Steam Cultivation Works
Orchids predominantly originate from humid tropical regions where warm air and consistent moisture levels create an ideal growing environment. Many species are epiphytes, which means they grow on other plants or surfaces without soil, relying heavily on ambient humidity and airflow.
Traditional indoor orchid cultivation often fails to replicate these specific microclimates, causing slow root growth, stress, and poor flowering. The steam cultivation method recreates the orchid’s natural humid, warm conditions inside a controlled environment, such as a mini greenhouse or enclosed terrarium.
Key Benefits of Steam Cultivation:
- Accelerated Root Growth: Warm, moist air stimulates cell expansion in root tips.
- Reduced Transpiration Stress: Enclosed humidity reduces water loss.
- Disease Prevention: Controlled environment limits fungal and bacterial infections.
- Energy Conservation: Orchids expend less energy adjusting to environment, directing resources to growth and blooms.
Step 1: The Steam Cultivation Technique — Creating the Perfect Environment
The cornerstone of the steam method is establishing a closed, humid environment that simulates the orchid’s native ecosystem.
Materials Needed:
- Transparent plastic containers or mini-greenhouses
- Heating pad or warm water source
- Hygrometer (to monitor humidity)
- Orchid pot with suitable medium (bark mix, sphagnum moss)
- Spray bottle for misting
Procedure:
- Prepare the Mini-Greenhouse: Use a transparent container large enough to accommodate your orchid without crowding. A plastic storage box or an inverted glass terrarium works well.
- Heat Source Setup: Place a heating pad beneath the container set to low heat or position a shallow bowl of hot water inside the enclosure. The goal is to maintain a warm temperature between 75°F to 85°F (24°C to 29°C).
- Maintain High Humidity: Aim for relative humidity levels of 70-90%. Regular misting and water reservoirs inside the enclosure help maintain moisture.
- Ventilation: Ensure there’s occasional air exchange to prevent mold. Open the enclosure for 5-10 minutes daily.
This steam environment encourages root cells to swell and divide rapidly, leading to faster root development.
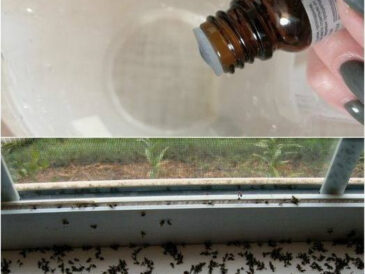
Step 2: Making Garlic Solution — A Natural Boost for Orchid Health
Garlic is not only a flavorful culinary ingredient but also a powerful natural fungicide and insecticide. Incorporating garlic into orchid care helps protect against root rot, fungal infections, and pests—all of which are common issues in humid growing conditions.
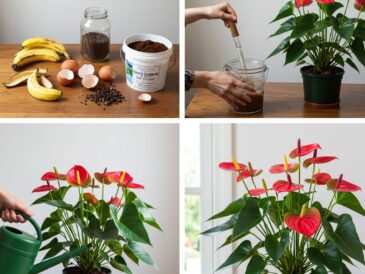
Garlic Solution Recipe:
Ingredients:
- 1 teaspoon garlic powder or 2 crushed garlic cloves
- 1 liter of distilled water
- Optional: a few drops of mild liquid soap to aid dispersion
Preparation:
- Infuse garlic powder or crushed cloves in distilled water for 24 hours.
- Strain the mixture to remove solids.
- Add a few drops of mild soap if desired.
- Transfer to a spray bottle.
Application:
- Spray the garlic solution on orchid roots and foliage once a week.
- Water orchids with diluted garlic solution during regular irrigation every 2-3 weeks.
- Use as a preventative treatment before transplanting or repotting.
This natural treatment helps reduce microbial pathogens and supports the orchid’s nutrient uptake efficiency.
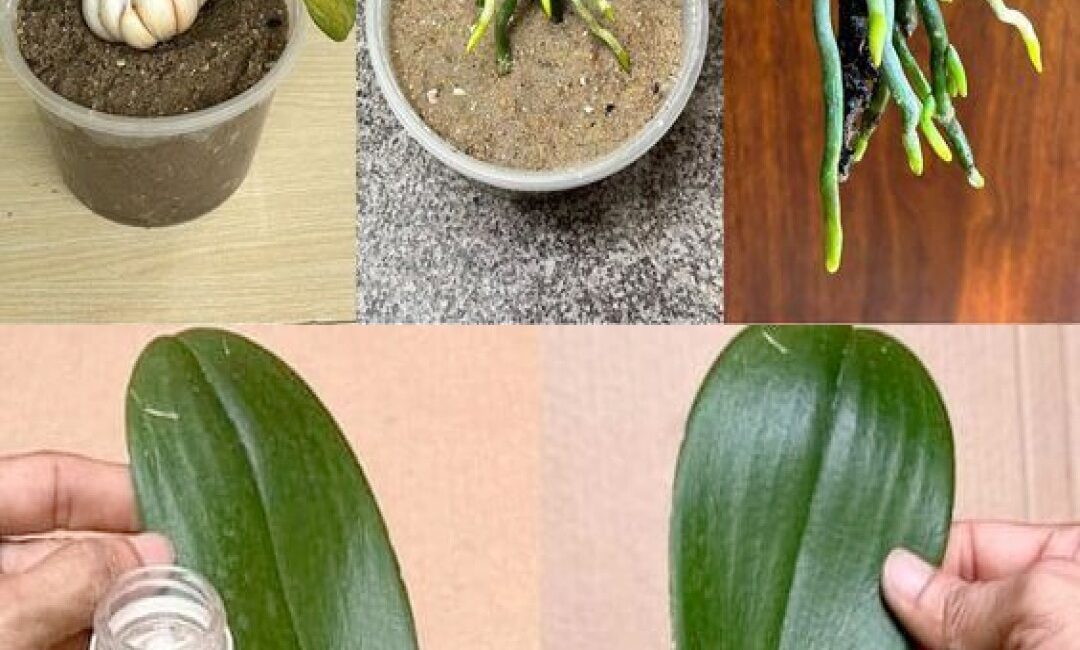
Step 3: Creating a Humid Habitat — Using a Plastic Bottle Mini-Greenhouse
If a large container isn’t practical, a simple DIY mini-greenhouse using a plastic bottle can provide the necessary humidity for orchids.
Instructions:
- Choose a large transparent plastic bottle (2-liter soda bottles work well).
- Cut the bottom off and place the orchid pot inside.
- Replace the cap loosely or drill small holes for minimal ventilation.
- Place in indirect light, avoiding direct sun to prevent overheating.
- Mist inside regularly to maintain moisture.
This compact method is ideal for windowsills and limited indoor spaces. The humidity trapped inside closely mimics tropical conditions, creating a microclimate that encourages rapid root growth and sustained blooms.
Step 4: Orchid Placement and Support — Maximizing Light and Stability
Click page 2 for more