Perfect with cold cereal or hot oatmeal—add at end to preserve chewiness.
7. Tea infusions
Steep slices in hot water (with lemon or mint) for fruit‑infused drink; keep slices for a nibble.
8. Cocktail/mocktail garnish
Use as elegant garnish for drinks: white wine spritz, fruit punch, kombucha, or berry‑based cocktails and virgin cocktails.
9. Gift jars
Pack homemade dried strawberries in clear jars, add a ribbon and label—they’re beautiful, healthy gifts.
Troubleshooting Guide: Common Questions
| Problem | Possible Cause | Solution |
|---|---|---|
| Slices too sticky or moist | Under‑dried, still containing moisture | Bake longer, check often, ensure slices don’t overlap; air‑dry after oven |
| Slices hard and brittle | Over‑dried or too thin | Use thicker cut (~1/8–1/4 ”), remove earlier in the process |
| Uneven texture | Inconsistent slice thickness, crowded baking | Slice evenly, spread out slices, rotate trays midway |
| Burning edges or crispy bits | Oven too hot or slices too thin | Lower temperature slightly, reduce bake time, check earlier |
| Mold or spoilage after storing | Moisture re‑absorption, humidity, improper seal | Ensure fully dry, refrigerate or freeze, use airtight sealed container |
Scaling Up: Batch Processing & Food Safety
If you plan to make larger quantities, here’s how to scale effectively:
- Multiple trays: Bake several sheets at once. Rotate upper and lower trays halfway for even airflow.
- Commercial dehydrator alternative: If you find yourself doing this frequently, a food dehydrator saves oven space and energy—but oven method remains reliable.
- Temperature calibration: Invest in an inexpensive oven thermometer to ensure that 200 °F is accurate—if your oven runs hot, reduce setting or crack the door.
- Food safety tips:
- Use fresh, blemish‑free fruit.
- Clean all utensils and surfaces.
- Let slices cool completely before sealing to avoid condensation.
- Periodically check jars for moisture or mold and discard any suspect pieces.
FAQ and Reader Questions
Q: Can I use frozen strawberries?
A: Not recommended. Frozen berries release additional moisture during thawing and bake unevenly. Always start with fresh, thoroughly dried berries.
Q: Can I include a citrus flavor or seasoning?
A: While tips suggest no salt or seasonings, you can experiment with lemon zest, a light dusting of cinnamon, or even tarragon. Keep in mind these alter the pure fruit flavor.
Q: What’s better—chewy or crispy?
A: That depends on preference. Thinner slices and longer bake → crisp chips. Slightly thicker slices and shorter bake → pliable, chewy pieces. Taste and texture matter most.
Q: Is it safe to store at room temperature?
A: Only for short periods (1–2 weeks) in very dry climates. Refrigeration is recommended.
Estimated Nutritional Facts (approx. per 1 oz dried strawberries)
- Calories: ~90–100 kcal
- Carbohydrates: ~21 g (Sugars: 14 g, Fiber: 3–5 g)
- Vitamin C: significant portion of daily needs
- Manganese, Folate, Potassium: Good amounts
(Exact figures vary by berry size and dryness level.)
Flavor & Pairing Suggestions
- Chocolate: Pair with dark chocolate or cocoa‑nib trail mix.
- Cheese: Serve with soft cheeses (brie, goat cheese, ricotta) and crisp crackers.
- Nuts & seeds: Combine with almonds, cashews, pistachios, packed lunches or snack tins.
- Herbs: Garnish mint or basil ice cream; great in mint yogurt or lemon‑mint salads.
Variations You Might Try
Fruit blends
Dry apples, pears, peaches alongside strawberries for fruit medley chips.
Infused slices
Lightly brush strawberry slices with vanilla extract or citrus juice before baking for subtler aromatics.
Spice infused
Dust with cinnamon sugar or ginger for dessert‑style flavor (but that introduces sugar).
Candied version
For a treat, after baking and air‑drying, toss slices with superfine sugar or honey, then toast lightly under broiler—but this is not strictly oven‑dried.
Step‑by‑Step Recap (Cheat Sheet)
- Preheat oven to 200 °F
- Wash and dry berries thoroughly
- Slice horizontally, 1/8–1/4 ″ thick
- Arrange on baking sheet, no overlap
- Bake for ~3 hours; check occasionally
- Air‑dry for 1 hour at room temp
- Cool completely, then store in airtight container
- Refrigerate or freeze to extend shelf life
Why This Method Works: The Science Behind Drying
- Moisture removal: Slowly evaporates water content without cooking.
- Sugar concentration: Reduced water intensifies the natural fruit sugars, creating a chewy sweetness.
- Low heat: Prevents Maillard browning or burnt edges. Maintains flavor compounds.
- Airflow: Cracking the door or using convection improves evaporation.
Why You’ll Love This Homemade Approach
- Cost savings: One batch of fresh strawberries makes a lot of dried pieces, much cheaper than store‑brands.
- Control: You decide slice thickness, texture, and purity (no added sugar or preservatives).
- Nutrition conscious: Keeps fiber, antioxidants intact—no refined ingredients or oils.
- Versatility: Snack it plain, add to recipes, pack in lunchboxes, use in desserts—so many options.
- Giftability: Make small jars as homemade gifts for friends, family, or teachers.
Final Thoughts: Turning Strawberries into Artisanal Chewy Chips
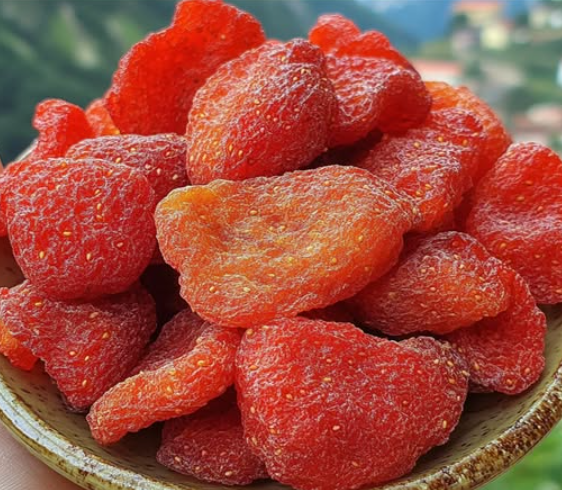
The journey from juicy berry to chewy, naturally sweet treat is both simple and rewarding. With basic kitchen tools and a bit of patience, you unlock a fruit snack that’s visually appealing, nutritionally dense, and packed with flavor. Whether you’re aiming for crisp chips or tender, bendable bites, the oven‑dry method gives you full creative control.
Remember: thin and even slicing, baking at low temperature, checking texture as you go, and thorough cooling before storage make all the difference. And with smart storage, your dried strawberries stay delicious and mold‑free for weeks.
So gather fresh strawberries, sharpen your knife or mandoline, preheat the oven, and begin the transformation. This detailed recipe empowers you to create premium dried strawberries—chewy, sweet, shelf‑stable, and endlessly versatile.
Happy drying and savoring your homemade oven‑dried strawberries!


