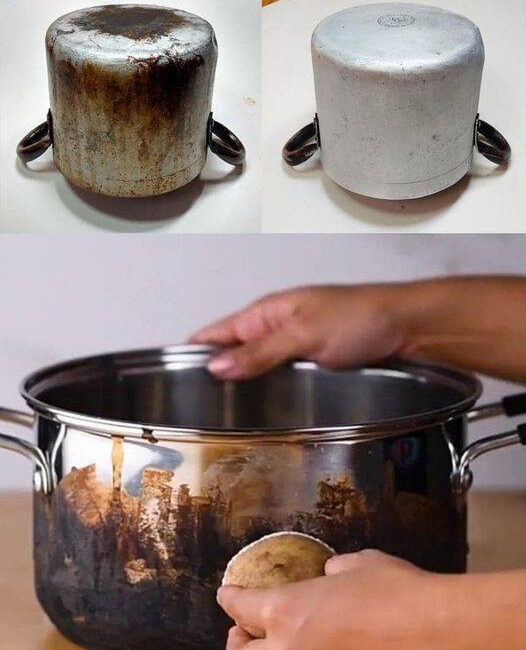
Burnt residue on pots and pans is one of the most frustrating challenges in any kitchen. Whether it happens during a hurried dinner preparation, a simmer gone too long, or a forgotten pan on the stove, burnt marks and stubborn residues can make even the simplest cleaning task feel daunting. Burnt pots not only look unsightly but can also affect the taste of future meals, harbor bacteria, and reduce the lifespan of your cookware. Fortunately, there is a simple ingredient that can instantly remove burns, transforming your kitchen experience and making cookware maintenance effortless.
In this comprehensive guide, we’ll explore everything about burn removal, including the science behind burnt residues, why certain cleaning methods fail, and step-by-step instructions for restoring your pots and pans to pristine condition. This guide also delves into preventive strategies, eco-friendly solutions, and tips for maintaining your cookware so that cleaning becomes less of a chore. By the end of this article, you’ll be equipped with the knowledge and techniques to tackle burnt cookware confidently.
Understanding the Problem: Why Pots and Pans Burn
Before diving into cleaning solutions, it’s important to understand why pots and pans get burnt in the first place. Several factors contribute to stubborn burn marks:
- High Heat Cooking: Excessive heat can scorch food and cause it to stick to the metal surface.
- Sugar and Fat: Ingredients like sugar, syrup, butter, and oil can burn quickly if not monitored, leaving sticky black residues.
- Neglecting the Pan: Even brief periods of neglect can result in burns that adhere to the surface, making cleaning harder.
- Type of Cookware: Non-stick pans, stainless steel, aluminum, and cast iron all react differently to heat and cleaning agents. Each material requires a specific approach for safe burn removal.
- Water Evaporation: When water evaporates from a pan too quickly, food particles can char and stick to the surface.
Understanding the root cause of burns allows you to choose the most effective removal method and prevent future occurrences.
The Secret Ingredient: Baking Soda
The ingredient that instantly removes burns on pots and pans is baking soda, also known as sodium bicarbonate. This common household item has been a cleaning staple for decades due to its mild abrasiveness, alkalinity, and non-toxic nature. Its chemical properties make it incredibly effective at breaking down burnt food residue and grease without damaging most types of cookware.
Why Baking Soda Works
- Mild Abrasive Action: Baking soda’s fine powder can gently scrub away burnt-on particles without scratching most surfaces.
- Alkalinity: As an alkaline substance, it reacts with acidic burnt residues (like tomato sauces or sugary spills), breaking them down and loosening the burnt layer.
- Odor Neutralizer: Burnt food often leaves unpleasant odors. Baking soda neutralizes these odors, leaving cookware fresh.
- Eco-Friendly Solution: Unlike harsh chemical cleaners, baking soda is safe, biodegradable, and non-toxic, making it perfect for kitchen use.
Its effectiveness is particularly notable on stainless steel, non-stick pans (with caution), cast iron, and aluminum, making it a versatile and reliable solution for almost any cookware.
Step-by-Step Guide to Removing Burns Using Baking Soda
Removing burns with baking soda is simple, but the method depends on the severity of the burn and the type of cookware. Below are detailed instructions for different scenarios.
1. Light Burns
For minor scorches or sticky residues:
- Sprinkle a generous layer of baking soda over the burnt area.
- Add a small amount of water to form a paste.
- Let the paste sit for 15–30 minutes to allow it to break down the residue.
- Use a soft sponge or cloth to scrub gently.
- Rinse thoroughly with warm water and dry the pan.
This method is safe for non-stick pans, stainless steel, and aluminum.
2. Medium Burns
For stubborn residues that won’t come off with light scrubbing:
- Fill the pan with enough water to cover the burnt area.
- Add 2–3 tablespoons of baking soda and bring the water to a gentle boil.
- Allow the mixture to simmer for 10–15 minutes, which helps loosen the burnt particles.
- Remove from heat and allow the water to cool slightly.
- Scrub with a non-abrasive sponge until the residue lifts.
- Rinse and dry thoroughly.
This method works well for stainless steel, cast iron (without soaking), and durable aluminum cookware.
3. Heavy Burns
For severe, charred layers that seem impossible to remove:
- Make a thick paste of baking soda and water (about 1:1 ratio).
- Spread the paste generously over the burnt area.
- Allow it to sit overnight.
- In the morning, use a plastic or silicone scraper to gently lift the loosened residue.
- If needed, repeat the process or use a second round of simmering with baking soda and water.
This method may be required for heavily burnt stainless steel pots or pans with baked-on cheese, sauces, or sugary residues.
4. Additional Boost: Vinegar and Baking Soda
For extra-stubborn burns, combining baking soda with white vinegar enhances the cleaning power:
- Sprinkle baking soda over the burnt area.
- Pour a small amount of white vinegar on top. The mixture will fizz, which helps lift burnt particles.
- Let it sit for 10–15 minutes.
- Scrub with a sponge or brush, rinse, and dry.
This method is particularly effective for burnt-on tomato sauces and sticky sugar-based burns.
Material-Specific Tips for Burn Removal
Not all cookware responds the same way to cleaning. Here’s a breakdown:
Click page 2 for more