Follow your pressure canner’s manual carefully. The general rule for meat and rice combinations is:
- Process time: 90 minutes for 1-liter jars, 75 minutes for 500ml jars
- Pressure: 10 psi (69 kPa) for altitudes below 1000 ft (305 m); increase pressure if at higher altitude (check your canner’s guide)
Steps:
- Place jars in the pressure canner on the rack.
- Add water as instructed (usually 5–8 cm deep).
- Close the lid, vent steam for 10 minutes to remove air.
- Place the weight and bring the canner to pressure.
- Start timing only when full pressure is reached.
- When done, turn off the heat and allow the pressure to drop naturally.
- Once safe, open the lid away from your face and carefully remove jars.
Let the jars cool undisturbed for 12–24 hours.
Step 7: Check Seals and Store
After cooling, check each lid — it should be concave (slightly pulled inward) and shouldn’t move when pressed.
If a lid pops up and down or didn’t seal properly, refrigerate that jar immediately and consume within a few days.
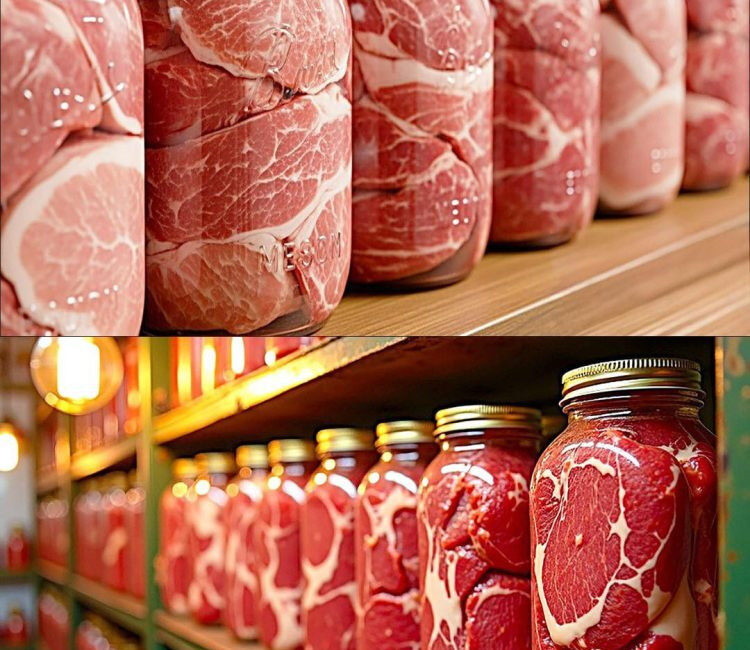
Store sealed jars in a cool, dark, and dry place — a pantry or cupboard away from sunlight. Properly sealed jars can last up to 12 months.
Label each jar with the date of canning for easy tracking.
Step 8: Serving and Enjoying Your Homemade Canned Meal
When you’re ready to eat, simply:
- Open the jar and inspect (the contents should smell normal and look appetizing).
- Heat in a pan or microwave until piping hot.
- Add a bit of butter, soy sauce, or herbs for a fresh twist.
You’ll be amazed at how rich and flavorful it tastes — the meat tender, the rice infused with deep, savory notes. It’s comfort in a jar.
Flavor Variations to Try
1. Mediterranean Style:
Use chicken, olive oil, tomatoes, garlic, thyme, and oregano. Add a touch of lemon zest before sealing.
2. Moroccan-Inspired:
Beef or lamb with turmeric, cumin, paprika, and a few raisins. The result is warm, spiced, and fragrant.
3. Asian Style:
Use soy sauce, ginger, and a bit of sesame oil. Great with chicken or beef and rice.
4. Mexican Version:
Combine chicken with black beans, rice, corn, chili powder, and cumin.
5. Rustic Beef and Barley Alternative:
Replace rice with barley for a heartier, old-fashioned preserved stew.
Tips for Success
- Avoid dairy: Milk, cream, and cheese don’t preserve safely in jars. Add them fresh when reheating.
- Keep proportions: Too much rice can absorb all the liquid and expand during canning, causing jar overflow.
- Fat control: A little oil is fine, but excess fat can cause seals to fail.
- Always inspect before eating: If the jar leaks, bulges, smells odd, or looks foamy, discard it — safety first.
Why It’s Worth Doing
This process may seem long the first time, but once you’ve done it, you’ll never forget the satisfaction. Homemade preserved meals are practical and comforting — perfect for:
- Busy workdays when you want dinner in minutes
- Camping or travel
- Unexpected guests
- Power outages or emergencies
It’s also budget-friendly. You can take advantage of seasonal discounts on meat or rice and turn them into ready-made meals that last for months.
Beyond practicality, there’s something deeply human about it — the act of preserving. You’re not just saving food; you’re saving effort, time, and the simple joy of a homemade meal that waits patiently on your shelf.
The Final Reward
A row of neatly sealed jars filled with tender meat, golden rice, and aromatic spices isn’t just food storage — it’s security, self-sufficiency, and craftsmanship. You’ve bottled comfort itself.
When you open one of those jars months later, and the smell of seasoned broth and slow-cooked meat fills your kitchen, you’ll taste not just a meal — but the quiet satisfaction of knowing you made it from scratch, safely, and with care.
In a world where everything feels rushed and disposable, a jar of homemade preserved meat and rice is proof that patience and tradition still have a place on your table.