Most people see their washing machine as a simple tool: throw in dirty clothes, add detergent, press start, and voilà—fresh laundry. But beneath that routine simplicity lies a sophisticated system designed to balance water, detergent, and motion in perfect harmony. And at the heart of this quiet ecosystem sits one of the most overlooked heroes of home appliances: the residue filter.
It’s not flashy, it doesn’t beep, and it rarely gets any attention—until it clogs. Yet this small, often hidden component is what keeps your machine breathing, draining, and delivering the cleanliness you expect. Neglecting it can turn even the most high-tech washer into a smelly, inefficient mess.
So, what exactly does it do? Why is it there? And why should you care about cleaning it? Let’s explore the invisible science behind your washing machine’s residue filter, the problems it prevents, and the surprisingly deep connection it has to hygiene, maintenance, and even environmental protection.
What Is the Washing Machine Residue Filter?
In the simplest terms, the residue filter (also known as the lint filter, drain pump filter, or debris trap) acts as a gatekeeper inside your washing machine. Its job is to capture small particles, fibers, hair, and foreign objects that are released during each wash cycle.
When you wash clothes, especially fabrics like wool, cotton, or fleece, thousands of microscopic fibers detach and mix into the water. Add in lint, pet hair, tiny paper scraps left in pockets, and even the occasional coin or button—and you have a recipe for a clogged drain.
That’s where the residue filter comes in.
It’s a small mesh screen or plastic compartment that sits between the drum (where your clothes are) and the drain pump (the part that removes water at the end of each cycle). It catches everything that shouldn’t go further down the system—like the lint from your black hoodie, or that forgotten tissue that disintegrated in your jeans pocket—so your pump and hoses stay clear.
You could say it’s the washing machine’s version of a digestive system filter: it keeps the whole body healthy by trapping what doesn’t belong.
A Hidden Component with a Vital Purpose
The residue filter’s purpose can be summed up in one sentence: it protects the washing machine from itself.
Here’s how:
- Prevents Drain Blockages
Without the filter, debris would flow straight into the drainage hose and pump. Over time, buildup could block the flow of water or damage the pump impeller (the small blades that push water out). This would lead to standing water in your drum, “drain error” codes, or in the worst case, flooding. - Ensures Proper Cleaning Performance
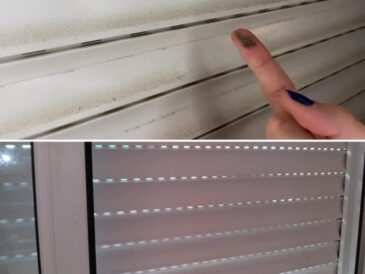
A clogged or dirty filter makes the machine work harder to drain, which can leave detergent residue, lint, and soap scum on clothes. If you’ve ever pulled out laundry that smelled musty or didn’t feel fully rinsed, the filter might be the silent culprit. - Reduces Odor and Bacterial Growth
Lint and organic material trapped in warm, moist conditions become breeding grounds for bacteria and mold. Cleaning the residue filter regularly prevents the musty “wet dog” smell that plagues many washers over time. - Extends Machine Lifespan
When the filter is clogged, the drain pump has to overwork to push water through. This extra strain can burn out the motor prematurely. A clean filter means the entire system breathes freely and lasts longer. - Improves Energy Efficiency
A well-maintained filter ensures faster drainage, shorter spin times, and better water circulation—all of which translate to lower electricity and water use.
In short, this unassuming component quietly saves you money, keeps your laundry hygienic, and protects the heart of your machine.
Where the Filter Lives and How It Works
The design and location of the residue filter vary depending on the type of washing machine you own:
1. Front-Loading Machines
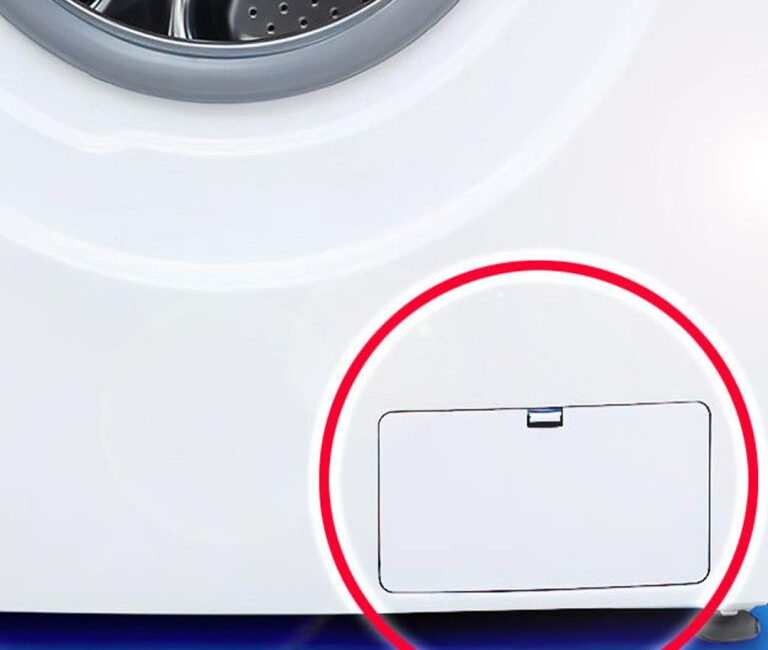
In most front-loaders, the residue filter sits behind a small hatch or panel at the bottom front of the machine. You’ll often see it beside a small rubber hose—the emergency drain.
When the machine finishes washing, water drains through a pump that pushes it out via this filter. Before the water exits, the filter traps any physical debris.
2. Top-Loading Machines
Older or traditional top-loaders often have their filter inside the agitator column (that central piece in the middle of the drum). Others hide it along the rim or side walls. These filters tend to collect floating lint and hair during the wash and rinse cycles.
3. High-Efficiency (HE) Models
Some newer HE washers come with self-cleaning filters that automatically flush debris into the drain. However, even these systems need occasional manual cleaning, as not everything can be fully flushed out.
Regardless of the design, every washer has some filtration mechanism—visible or not.
What Happens If You Never Clean It
Let’s imagine you skip cleaning the residue filter for a year. What could possibly go wrong? A lot, actually.
At first, you might notice small inconveniences—like linty clothes or a faint odor. But as buildup increases, the problems escalate:
- Water drainage slows or stops altogether.
- Clothes stay damp because the machine can’t spin water out effectively.
- The pump starts making grinding or buzzing noises.
- Mold and bacteria thrive, creating unpleasant smells.
- Cycle times get longer, as the machine struggles to compensate for the blockage.
- Energy consumption rises, since the pump and motor work harder.
Eventually, the machine could stop mid-cycle or display an error message. Some people mistake this for a mechanical failure, call a technician, and end up paying for a “repair” that’s fixed in 10 minutes by simply cleaning the filter.
So yes—cleaning the residue filter is a small task that prevents big problems.
How to Clean It Properly (Step by Step)
Step 1: Turn off and unplug the washing machine.
Never perform maintenance on an active appliance.
Step 2: Prepare for water spillage.
Place a towel, tray, or shallow bowl under the filter area—some water will drain out.
Step 3: Locate and open the filter cover.
Front-loaders usually have a small door at the bottom. Top-loaders may require lifting part of the agitator or rim.
Step 4: Remove the filter.
Twist it counterclockwise or gently pull it out, depending on the model.
Step 5: Clean thoroughly.
Rinse under warm water, removing lint, dirt, and residue with a soft brush. For stubborn grime, soak it in a mix of water and vinegar for 15 minutes.
Step 6: Wipe the cavity.
Before reinserting, use a damp cloth to clean inside the filter housing—gunk often hides there.
Step 7: Reinsert and tighten.
Make sure it’s secure but not overly tight.
Step 8: Test the machine.
Run a short rinse or drain cycle to confirm proper drainage.
Frequency: Every 1–2 months for light use, every 2–4 weeks for families, and monthly for homes with pets.
A Quick Note on Safety
Click page 2 for more