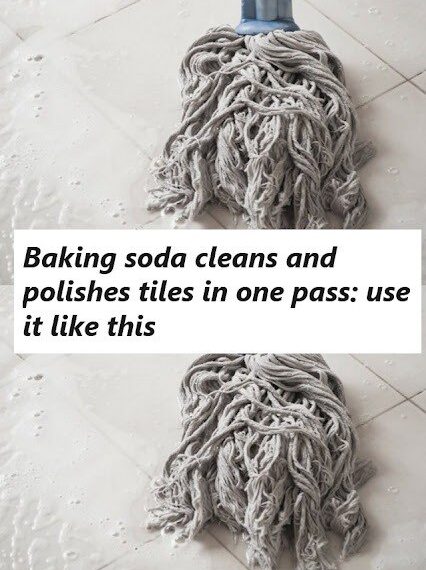
Tile floors, countertops, and walls can brighten up any space, but over time, they start to lose their shine and become susceptible to stains, grime, and general wear. Whether you have ceramic, porcelain, or even natural stone tiles, keeping them spotless can seem like an endless chore, especially with the buildup of soap scum, dirt, and grease. Many commercial cleaning products out there are filled with harsh chemicals that can harm your tiles and the environment. So, what’s the alternative? It’s simple, affordable, and effective—baking soda.
Baking soda, also known as sodium bicarbonate, is one of the most versatile cleaning agents out there. It’s non-toxic, inexpensive, and highly effective when it comes to cleaning and polishing tiles. In this article, we’ll explore how you can use baking soda to clean and polish tiles in one pass. You’ll learn everything from simple techniques to more advanced strategies, tips, and tricks that will leave your tiles gleaming without the need for expensive cleaners.
Why Baking Soda is the Perfect Tile Cleaner
Before we jump into the step-by-step process of cleaning and polishing tiles with baking soda, let’s take a look at why it works so well.
- Mild Abrasive Action: Baking soda’s fine, gritty texture helps scrub away dirt, grime, and stains without damaging the surface of the tiles. It gently scrubs without being too harsh, which makes it ideal for both delicate and sturdy tiles.
- Odor Neutralizer: Baking soda doesn’t just clean; it neutralizes odors too. This can be particularly helpful in kitchens and bathrooms where moisture, food particles, and bacteria tend to create unpleasant smells.
- Gentle on Surfaces: Unlike some chemical cleaners that can strip the finish off tiles, baking soda is gentle and safe to use, even on high-gloss or polished surfaces.
- Non-Toxic and Eco-Friendly: As a natural compound, baking soda is free of harmful chemicals and is safe for your health and the environment. It’s an excellent choice for families with children and pets.
What You’ll Need
Before you begin, gather the following items to clean and polish your tiles with baking soda:
- Baking soda (obviously!)
- Water (preferably warm)
- A clean sponge or microfiber cloth
- A bucket or small mixing container
- An old toothbrush or soft-bristled brush (for grout cleaning)
- A mop (if you’re working on a large surface)
- A clean towel or drying cloth
How to Clean and Polish Tiles with Baking Soda: A Step-by-Step Guide
The beauty of using baking soda to clean and polish tiles is that it’s simple, effective, and doesn’t require a lot of time. Whether you’re dealing with your kitchen backsplash, bathroom tiles, or floor tiles, this process works seamlessly across the board.
Step 1: Clear the Area
Before you begin cleaning your tiles, clear the area of any furniture or objects that might be in the way. If you’re cleaning floor tiles, sweep or vacuum up any dust and debris. This will ensure that you’re not just moving dirt around, but actually cleaning your tiles effectively.
Step 2: Create Your Baking Soda Paste
For cleaning tiles, you’ll typically want to create a thick paste by mixing baking soda with water. Start by adding about 1/2 cup of baking soda into a bowl or bucket. Then, slowly add water until you form a thick, spreadable paste. The consistency should be similar to toothpaste.
- Tip: If you have tough stains or need extra cleaning power, you can add a small amount of vinegar or lemon juice to your paste. These natural acids help break down grime and stains even further.
Step 3: Apply the Paste to the Tiles
Once your paste is ready, use a sponge, cloth, or soft-bristled brush to apply the baking soda paste directly to the tile surfaces. Work in small sections to avoid the paste drying out before you get a chance to scrub.
- For floor tiles, you can use a mop or sponge to apply the paste.
- For backsplashes or wall tiles, a soft cloth or microfiber towel works best to avoid dripping.
Make sure to focus on areas with visible grime, stains, or areas that need extra attention, such as high-traffic spots or bathroom corners.
Step 4: Scrub the Tiles
Using a clean sponge or soft-bristled brush, gently scrub the baking soda paste into the tiles in circular motions. The baking soda will start to break down dirt and stains as you go. For areas that have heavy grout stains or accumulated dirt, apply more pressure but be careful not to scratch the tiles.
- Grout Cleaning: Baking soda is especially effective at cleaning grout. Apply a thicker layer of paste to the grout lines and let it sit for a few minutes before scrubbing with a toothbrush or small brush. This helps lift up dirt and grime without damaging the grout.
- Heavy Stains: For stubborn stains or discoloration, let the paste sit on the area for 5-10 minutes before scrubbing. The baking soda will work to lift the stains, making them easier to wipe away.
Step 5: Rinse Off the Paste
Once you’ve finished scrubbing, it’s time to rinse away the baking soda paste. Use a clean, damp sponge or cloth to wipe down the tiles, removing all the paste and any loosened dirt. If you’re cleaning floor tiles, mop the area with clean water to remove any remaining residue.
Step 6: Dry and Polish the Tiles
After you’ve removed the paste, use a clean, dry towel to wipe down the tiles and give them a quick polish. The natural properties of baking soda leave tiles with a subtle shine that will make your floors, countertops, and walls gleam.
- Tip: For an extra glossy finish, use a microfiber cloth to buff the tiles gently once they’re dry. The soft fabric will help enhance the shine without scratching the surface.
Tips for Using Baking Soda on Different Types of Tiles
While baking soda works well on most tiles, there are a few things to keep in mind based on the type of tiles you’re cleaning.
1. Ceramic and Porcelain Tiles
click page 2 to continue