Let’s start by unpacking why there’s such a wide disparity in advice: some older cooks say hours, others say half an hour, and still others stick to a few minutes. There are several reasons:
- Traditional habits: In the past, methods for cooking corn were more utilitarian. Corn might have been older, less sweet, stored longer, or grown under different conditions. That often meant tougher kernels and more cooking time. When a grandmother or elder says “cook it for an hour,” they might simply be working with corn that had already lost freshness.
- Different varieties and growing conditions: There are standard‑sweet corn, super‑sweet corn varieties, home‑garden corn, and older field corn. Some are naturally tender, some tougher. If someone is used to older field‑type corn, they’ll cook longer.
- Texture preference: Some people like corn very soft—almost falling apart—while others like crisp‑tender. Those who like extremely soft may naturally cook much longer, leading to hours of boiling.
- Equipment, volume and practical factors: A big pot of crowded corn, a full dinner service, or a large family meal might lead to “leave it for a while” habits. If the pot is left simmering while other tasks are done, it can stretch into hours.
- Mis‑communication and exaggeration: Over time advice gets passed down and hyperbole sneaks in—“just a little longer” becomes “one hour,” becomes “three hours” in retelling.
So when your mother‑in‑law says 3–4 hours and your mother says 1–1.5 hours, they are simply reflecting different past conditions and preferences. The fact is the modern sweet corn you buy will not need anything like that. In fact, such long cooking times will reduce the quality of the corn rather than improve it.
The Science of Boiling Corn on the Cob
To understand why the minimal time is best, we need to look at what happens inside that ear of corn when you boil it.
Kernel structure and what boiling does
Corn kernels are mostly water, sugar, and starch. When fresh, sweet‑corn kernels have a high sugar content and tender cell walls. When you boil the ear, heat penetrates, cell walls soften, starches begin to gelatinize, sugars may convert, and water may migrate. A well‑cooked kernel is plump, bright in color, sweet, and tender—but still with some structure.
What happens with excessive cooking
If you boil too long, you’ll encounter several issues:
- Sugar degradation: The naturally sweet flavor of fresh corn comes from its sugar content. As cooking time increases, that sugar can degrade or convert to starch, meaning the flavor becomes dull or more starchy.
- Texture collapse: The tender cell walls that were holding moisture and structure will soften too much, causing kernels to swell, split or become water‑sodden. Instead of a crisp‑tender bite, you get mushy or mealy kernels.
- Color and nutrient loss: The bright color of corn is part of the appeal. Over‑cooking will dull the color, and water‑soluble nutrients may leach out into the cooking water.
- Energy and efficiency waste: From a cooking‑practical viewpoint, boiling for hours uses unnecessary energy and time, when quality is better preserved with a short, sharp cook.
The ideal “sweet spot”
Given that the kernels only need to be heated through, gelatinize slightly, and remain tender yet structured, the actual cooking time is measured in minutes. For a fresh ear, a few minutes of boiling until the kernels are bright, plump, and just tender is all you need. If the ear is larger, older, or partially frozen, you might add a couple more minutes—but not hours.
Modern Recommendations: What Time Should You Actually Use?
Based on the science and culinary practice, here’s a breakdown of timelines:
- Fresh sweet corn (husks removed, very fresh, tender kernels): ~3–5 minutes of boiling. At exactly the right moment, the kernels are bright, tender, not mushy.
- Corn that’s less than peak freshness (couple days old, larger kernels, thicker husk removed): ~6–8 minutes might be appropriate—to allow the heat more time to soften.
- Older corn, large batch, big ears, or husked late or stored longer: ~8–10 minutes may deliver acceptable results—but if you go much further, quality starts to decline.
- If the corn is frozen, or you boiled it in its husk, or at high altitude: maybe up to ~10‑15 minutes—but generally still well under an hour.
- Cooking for parties, big batches, or in boiling water used for other items: You still aim for the short window; you may need a minute or two more for hot‑water recovery time, not hours of simmering.
A summary table:
| Corn Condition | Approximate Boiling Time |
|---|---|
| Fresh, tender sweet corn | ~3–5 minutes |
| Slightly older or larger ears | ~6–8 minutes |
| Older corn / frozen / husked late | ~8–10 minutes (rarely more) |
| Party/large batch / high altitude | ~10–15 minutes at most |
| Hours of boiling | Not recommended—poor results |
In short: the 1–1.5 hour advice is still far too long, and the 3–4 hour advice is definitely not correct for the typical sweet corn you find in grocery stores or farmer’s markets. Your mother’s suggestion is closer to being reasonable (in the sense of less extreme), but still not ideal. The real answer is to cut the time way down, adapt for your corn’s freshness and size, and aim for minutes—not hours.
Step‑by‑Step: How to Boil Corn on the Cob Perfectly Every Time
Here’s a detailed, reproducible method to give you top quality results:
Ingredients & Preparation
- Choose fresh ears of sweet corn. The husks should be green, tight around the ear, with fresh silk. If possible, cook the same day or within a day of purchase for best flavor.
- Husk the corn (remove outer leaves and silk) unless you prefer to cook it with husk on (we’ll discuss husk‑on method below).
- Optionally rinse the ears under cool water to remove any remaining silk or dust.
- Have a large pot of water ready—enough to fully submerge the ears with at least one inch of water above.
- You may optionally add a pinch of salt or a teaspoon of sugar to the water—but many expert cooks omit salt in the water because salted water can slightly toughen kernels; better seasoning after cooking.
Equipment
- Large stockpot with lid
- Tongs or slotted spoon for safely lowering and removing ears
- Timer or watch with second‑minute tracking
- Serving platter, butter, salt, herbs, toppings ready
Cooking Method
- Bring water to a rolling boil. Fill the pot with cold or cool water, place on high heat and bring to vigorous boil.
- Lower the ears gently using tongs, one at a time, to prevent splashing or cracking. Ensure they’re fully submerged. If necessary, press them down gently so the water covers the entire ear.
- Return to boil: Once you place the ears in, the water will dip slightly in temperature. Wait just until it returns to a full rolling boil, then immediately set your timer.
- Boil for the appropriate time depending on the corn’s freshness:
- Very fresh: 3–5 minutes
- Slightly older: 6–8 minutes
- Older/frozen/larger: up to ~10 minutes
Do not aim for 1 hour.
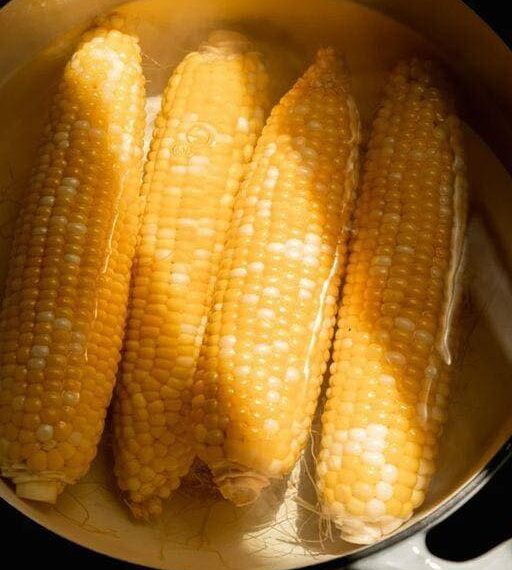
- Check for doneness near the end of the timer: use the tip of a knife or fork to pierce a kernel near the center. It should be hot, tender, plump, vibrant in color, and slightly firm—not mushy, not raw.
- Remove ears immediately once done, using tongs, and transfer to serving platter. You can optionally run under cool water briefly if you wish to halt cooking for serving later (though fresh served hot is best).
- Season and serve: Apply melted butter, salt, pepper, or herbs. Serve while hot to preserve flavor and texture. If serving later, keep warm but note the texture may degrade with time.
Additional Tips
- Keep ears spaced in your pot; overcrowding will cause the water temperature to drop and increase cooking time unpredictably.
- Use a lid if you like to help bring water back to boil faster, but remove it before the final minute so you can monitor.
- For a chilled‑corn version, after boiling reduce to ~1–2 minutes and then immediately plunge into an ice bath to stop cooking and preserve crispness—ideal for corn salads.
Alternative Methods: Husking On, Grilling, Steaming, Microwaving
While we’ve focused on the standard husked‑and‑boiled method, it’s helpful to know other approaches and how they compare in time and results.
Husk‑On Boiling
Some prefer to leave the husk on and boil the corn. In that case, boiling time increases slightly because the husk acts as insulation. You might go ~8–10 minutes rather than 3–5. After cooking, you peel back the husk (which has steamed the kernels inside) and serve. The husk‑on method retains moisture but may slightly reduce the “crisp‑tender” bite.
Grilling Corn
Click page 2 for more