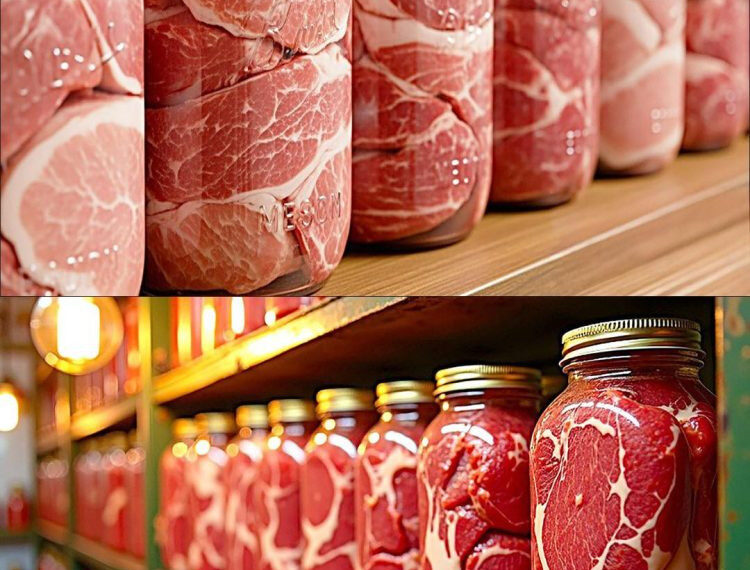
Preserving food in jars is one of humanity’s oldest culinary triumphs — a quiet kind of magic that turns a few hours in your kitchen into months (sometimes years) of shelf-stable comfort. There’s something deeply satisfying about hearing that soft “pop” of a sealed lid and knowing that inside, you’ve captured a ready-to-eat meal filled with nourishment, flavor, and care.
Today, we’re diving into a hearty, time-tested method: preserving meat and rice in jars. This classic combination creates a complete, balanced meal that’s ready whenever you need it — perfect for busy days, emergencies, travel, or simply for those evenings when cooking feels like too much work.
But before we dive into the how-to, it’s important to understand the why and the how behind safe preservation. Proper canning isn’t just about sealing food — it’s about science, precision, and respect for the ingredients.
Let’s walk through this from start to finish — ingredients, safety, sterilization, methods, and even variations. By the end, you’ll be able to fill your pantry with homemade jars of perfectly preserved rice and meat that stay delicious and safe for months.
Why Preserve Meat and Rice Together?
Rice and meat complement each other perfectly. Rice is a carbohydrate base that absorbs flavors beautifully, while meat provides protein, fats, and richness. When cooked and canned together, they create a dish that’s balanced, comforting, and satisfying.
Advantages of preserving them in jars:
- Shelf stability: Properly canned meat and rice can last up to a year or more without refrigeration.
- Convenience: Instant meals at home — just heat and eat.
- Zero waste: You preserve ingredients before they spoil.
- Control: You decide on salt, spices, and ingredients — no preservatives or artificial additives.
This process is also ideal for people who live in areas with power cuts or for those who prefer homemade over store-bought canned goods.
Safety First: Understanding Pressure Canning
Before anything else, we must talk about safety. When it comes to preserving meat, safety is non-negotiable. Meat and cooked rice are low-acid foods, which means they can harbor Clostridium botulinum — the bacteria responsible for botulism — if not preserved under the right conditions.
Boiling-water canning is NOT safe for meat or rice.
You must use a pressure canner, not a pressure cooker, because pressure canning reaches higher temperatures (around 116–121°C / 240–250°F) that destroy harmful spores.
If you don’t have a pressure canner, it’s better to freeze your meal rather than risk unsafe preservation.
Ingredients and Basic Ratios
You can adapt this recipe to your taste, but here’s a reliable base version for six 500ml jars (or three 1-liter jars):
Ingredients:
- 1 kg of meat (beef, lamb, chicken, or even turkey)
- 2 cups of rice (preferably parboiled or medium-grain rice)
- 3–4 tablespoons of oil or fat (olive oil, beef tallow, or butter)
- 1 large onion, chopped
- 3 cloves of garlic, minced
- 2 carrots, diced
- 1 bell pepper, chopped (optional)
- 1 teaspoon of salt (adjust to taste)
- 1 teaspoon black pepper
- 1 teaspoon paprika or turmeric
- 2 bay leaves
- 4 cups of hot broth or water
You can vary spices — cumin, thyme, rosemary, curry powder, or smoked paprika all work beautifully.
Step 1: Preparing the Jars and Lids
Cleanliness is the foundation of safe canning.
- Wash your jars, lids, and rings thoroughly with hot soapy water.
- Rinse well and inspect for cracks or chips (discard any damaged jars).
- Sterilize the jars by boiling them in water for 10 minutes, or place them in a preheated oven (120°C / 250°F) for 15 minutes.
- Keep the jars hot until use — never fill cold jars with hot food or they can crack.
Step 2: Preparing the Meat
- Cut the meat into bite-sized cubes. Trim off any excess fat (too much fat can interfere with sealing).
- Pre-cook the meat:
- Heat a large pan with oil or butter.
- Sear the meat on all sides until browned but not fully cooked. This step locks in flavor and reduces shrinkage.
- Remove the meat and set aside.
Step 3: Sauté the Vegetables
In the same pan, add onions, garlic, and carrots. Cook them until soft and golden. You can add bell peppers or other vegetables if you wish — just avoid starchy ones like potatoes (they don’t preserve well in jars).
Add your spices (salt, pepper, paprika, bay leaves, etc.) and stir for a few seconds to release their aroma.
Step 4: Parboil the Rice
You want your rice partially cooked, not fully done.
- Rinse the rice thoroughly to remove starch.
- Boil it in salted water for about 5–6 minutes — it should still be firm in the center.
- Drain and set aside.
Parboiling ensures that your rice will finish cooking during the canning process without turning mushy.
Step 5: Combine and Fill the Jars
Now comes the satisfying part — layering your homemade meal in jars.
Filling method:
- Start with a spoonful of sautéed vegetables at the bottom.
- Add a layer of meat (leaving space for rice and liquid).
- Add rice — about half as much rice as meat.
- Pour in hot broth or water, leaving about 2.5–3 cm (1 inch) of headspace at the top.
- Remove air bubbles using a clean knife or spatula.
- Wipe jar rims clean with a cloth dipped in vinegar to ensure a tight seal.
- Place sterilized lids and screw on rings until fingertip tight (not overly tight).
Step 6: Pressure Canning Process
Click page 2 for more