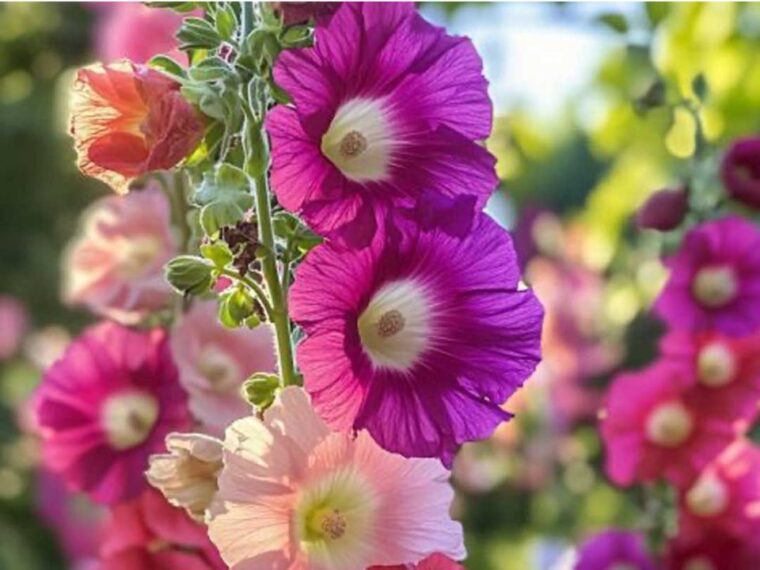
Hollyhocks (Alcea rosea) are among the most stunning and iconic flowers in cottage gardens. With their tall, towering spires of colorful blooms ranging from soft pastels to deep, dramatic shades, hollyhocks are beloved for their old-world charm and their ability to attract pollinators like bees, butterflies, and hummingbirds. Though they are biennials or short-lived perennials, with the right care, you can ensure they deliver an unforgettable floral display year after year. This article provides a comprehensive, detailed guide with 12 essential tips to achieve the best hollyhock blooms possible.
1. Choose the Right Variety
Not all hollyhocks are created equal. There are several species and hybrids, and the one you choose can influence bloom quality and garden success.
- Alcea rosea: The classic single or double hollyhock, often reaching 6 to 9 feet tall. Ideal for background plantings.
- Alcea ficifolia (Fig-leaved hollyhock): More resistant to rust and with a shrubbier, perennial form.
- Dwarf hybrids: For smaller spaces, dwarf varieties like the ‘Queeny’ series offer robust color without the towering height.
Choose rust-resistant varieties when possible to reduce maintenance and ensure healthier, more vibrant blooms.
2. Select the Ideal Location
Hollyhocks thrive in full sun and need a spot that receives at least 6 hours of sunlight per day. Proper sun exposure is crucial to:
- Stimulate robust flower production
- Prevent fungal diseases, such as rust
- Promote strong, upright growth
Choose a location that’s somewhat sheltered from strong winds, as these tall plants can be susceptible to wind damage. Placing them against a fence, wall, or hedge not only supports their structure but also provides a beautiful visual backdrop.
3. Prepare the Soil Thoroughly
Healthy soil is the foundation of spectacular hollyhock blooms.
- pH level: Slightly alkaline to neutral soil (pH 6.5 to 7.5) is ideal.
- Texture: Loamy, well-draining soil enriched with organic matter encourages deep root development.
- Preparation: Before planting, dig the soil to a depth of 12 to 15 inches. Work in compost, well-rotted manure, or leaf mold to improve fertility and structure.
Avoid compacted or overly wet soil, which can stunt growth and lead to root rot.
4. Sow or Transplant at the Right Time
Hollyhocks are typically biennial, flowering in their second year. To get the best results:
- Direct sow seeds in late spring to early summer. They’ll develop strong roots in year one and bloom the next.
- Start indoors if you want to control germination or grow a head start for transplanting.
- Transplant seedlings in early autumn or late spring, giving them time to establish before the blooming season.
Space them about 18 to 24 inches apart to ensure adequate airflow and reduce disease risk.
5. Water Wisely
Hollyhocks need consistent moisture, especially during their growing and blooming phases.
- Water deeply once or twice a week depending on rainfall. Shallow watering promotes weak roots.
- Avoid overhead watering, which can increase the risk of rust and mildew on leaves. Water at the base of the plant instead.
- Mulch with straw, wood chips, or shredded leaves to retain moisture and suppress weeds, while keeping the soil temperature stable.
Be especially mindful of watering during dry spells, as lack of moisture can cause the blooms to falter.
6. Feed for Big Blooms
Nutrient balance is critical for strong hollyhock flowers.
Click page 2 for more