Introduction
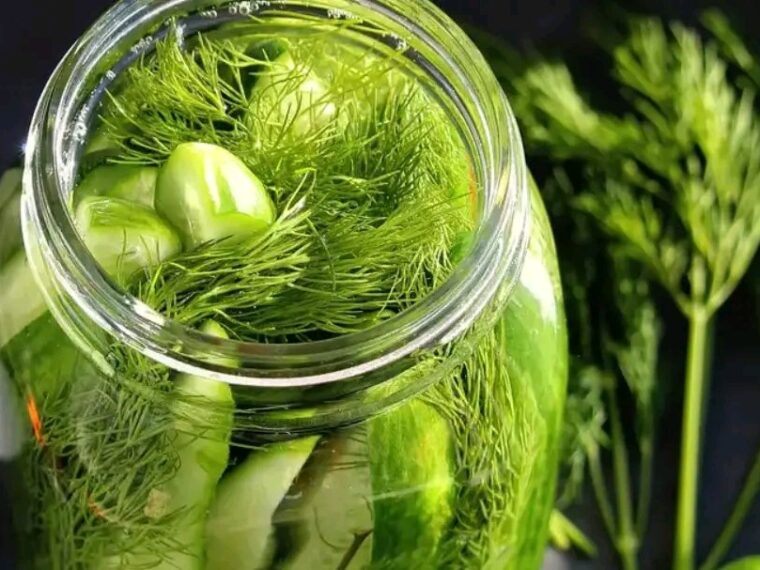
There’s nothing quite like homemade dill pickles—crunchy, tangy, and packed with fresh, garlicky flavor. If you’ve ever wondered how to make perfectly balanced, crisp, and delicious pickles at home, look no further! Aunt Bonnie’s homemade dill pickles are a family tradition, combining simple ingredients with a tried-and-true method to achieve that classic homemade pickle taste.
Making your own pickles is easier than you think, and the results are far superior to store-bought versions. With this recipe, you’ll learn how to sterilize jars, create the perfect brine, pack your cucumbers, and seal them for long-term storage. Whether you prefer them classic or with a spicy kick, this guide has everything you need to master the art of pickling!
Why You’ll Love This Recipe
✔ Easy & Beginner-Friendly – Simple steps for perfect pickles every time.
✔ Crunchy & Flavorful – No soggy pickles here—just crisp, fresh goodness!
✔ No Artificial Preservatives – 100% homemade with natural ingredients.
✔ Customizable Spice Level – Keep them mild or turn up the heat.
✔ Great for Gifts & Meal Prep – A delicious homemade treat for any occasion.
Ingredients for Aunt Bonnie’s Homemade Dill Pickles
Before we dive into the process, let’s go over what you’ll need:
Main Ingredients:
- 3 ½ pounds pickling cucumbers – Washed and quartered (choose small, firm cucumbers for the best crunch).
- 4 cups water – The base for the brine.
- 4 cups distilled white vinegar – Provides the signature tangy pickle flavor.
- ½ cup pickling salt – Ensures crisp texture and preserves the cucumbers.
Flavor Enhancers:
- 4 tablespoons dill seeds – Essential for that classic dill taste.
- 4 teaspoons mustard seeds – Adds depth and a slightly spicy note.
- 8 cloves garlic – Peeled and smashed for a bold, garlicky kick.
- 1 teaspoon red pepper flakes (optional) – For those who love spicy pickles!
- 1 large bunch fresh dill – The finishing touch for a fresh, herbal note.
Step-by-Step Instructions
Follow these detailed steps to create perfect homemade dill pickles.
Step 1: Sterilize Your Jars
- Fill a large pot with water and bring it to a boil.
- Submerge canning jars in the boiling water and let them sit for 10 minutes to sterilize.
- Remove the jars carefully and place them upside down on a clean towel to dry.
- Ensure your lids and bands are clean and ready for sealing.
Step 2: Make the Brine
- In a large saucepan, combine water, vinegar, and pickling salt.
- Bring the mixture to a rolling boil, stirring occasionally to dissolve the salt.
- Once the salt is fully dissolved, reduce the heat and let the brine stay warm while you prepare the jars.
Step 3: Pack the Jars
- Arrange the sterilized jars on your countertop.
- Pack each jar tightly with cucumber quarters, leaving about ½ inch of headspace at the top.
- To each jar, add:
- 1 tablespoon dill seeds
- 1 teaspoon mustard seeds
- 2 smashed garlic cloves
- A pinch of red pepper flakes (if using).
Step 4: Pour the Brine & Add Fresh Dill
- Carefully pour the hot brine over the cucumbers, ensuring all ingredients are fully submerged.
- Maintain a ½ inch headspace to allow for proper sealing.
- Place a sprig of fresh dill on top for extra flavor.
Step 5: Remove Air Bubbles & Seal
- Run a non-metallic utensil (like a chopstick) along the inside of the jar to release any trapped air bubbles.
- Wipe the jar rims with a clean, damp cloth to remove any brine or debris.
- Secure the lids and bands, tightening just until snug (not overly tight).
Step 6: Process the Jars in a Water Bath
- Place the filled jars into a boiling water bath using tongs.
- Ensure the jars are fully submerged in water.
- Process the jars in boiling water for 10 minutes to ensure a proper seal.
Step 7: Cool & Store
- Carefully remove the jars from the water bath and set them on a towel.
- Allow the jars to cool completely at room temperature.
- Once cooled, check the seals by pressing down on the center of each lid—if it doesn’t pop back, the seal is secure!
- Store your pickles in a cool, dark place and let them pickle for at least 2 weeks before eating.
Pro Tips for the Best Homemade Dill Pickles
⭐ Choose Fresh Cucumbers: Use firm, small pickling cucumbers for the best crunch.
⭐ Use Pickling Salt: Regular table salt contains additives that can make pickles cloudy.
⭐ Longer Pickling = Better Flavor: Let pickles sit for at least 2 weeks before opening for full flavor.
⭐ Keep Jars Airtight: A proper seal ensures freshness and prevents spoilage.
⭐ Add Extra Crunch: Soaking cucumbers in ice water for 2 hours before pickling keeps them crisp.
Flavor Variations & Customizations
🌿 Garlic Lovers’ Pickles: Add extra garlic cloves for an intense garlicky taste.
🔥 Spicy Pickles: Double the red pepper flakes or add sliced jalapeños.
🧄 Dill & Onion Pickles: Add thinly sliced onions for extra depth of flavor.
🍯 Sweet & Spicy Pickles: Stir 2 tablespoons honey into the brine for a touch of sweetness.
🌰 Pickles with a Kick: Add crushed black peppercorns for a bold, peppery finish.
Serving Ideas for Homemade Dill Pickles
🥪 On Sandwiches & Burgers – Adds crunch and tang to any sandwich.
🌭 With Hot Dogs & Sausages – Classic topping for an extra punch.
🧀 On a Charcuterie Board – Pair with cheese, olives, and cured meats.
🍹 In Cocktails – Use pickle brine in Bloody Marys or dirty martinis!
🥗 Chopped in Salads – Adds zing to potato or tuna salad.
Storage & Shelf Life
- Shelf Life: Properly sealed pickles last up to 1 year in a cool, dark place.
- Refrigeration: Opened jars should be refrigerated and consumed within 3 months.
- Spoilage Signs: If the pickles look cloudy, smell bad, or the seal is broken, discard them.
Frequently Asked Questions (FAQs)
1. How long do I have to wait before eating the pickles?
For the best flavor, let them pickle for at least 2 weeks before opening.
2. Can I reuse the brine?
It’s best to make fresh brine each time for safety and quality.
3. Can I skip the water bath?
If you plan to store them in the refrigerator, you can skip the water bath, but they must stay chilled.
4. How do I make the pickles crunchier?
Soaking cucumbers in ice water for 2 hours before pickling keeps them crisp.
5. Can I use apple cider vinegar instead of white vinegar?
Yes! Apple cider vinegar adds a slight sweetness and depth to the flavor.
Conclusion
With this foolproof homemade dill pickle recipe, you’ll never want store-bought pickles again! Crisp, flavorful, and easy to make, these pickles are a must-have for every pantry.
Try them today and enjoy the perfect homemade pickles with every bite! 🥒✨