Bread is one of the most universally beloved foods across cultures and cuisines. There is something deeply satisfying about the aroma of freshly baked bread wafting through the house in the morning—a perfect way to start any day. If you’re searching for a reliable, delicious, and easy-to-make bread recipe for breakfast, you’ve come to the right place.
This recipe has been a staple for many years for countless home bakers, myself included. It has never failed me: consistently yielding soft, fluffy, flavorful bread with a golden crust and a tender crumb. With simple ingredients and straightforward steps, you can enjoy fresh homemade bread every morning.
Ingredients Breakdown: What Makes This Bread So Delicious
Before diving into the preparation, let’s explore why each ingredient plays a crucial role in this recipe.
- 1 cup warm water (200 ml): The warm water activates the yeast and helps to dissolve the sugar and salt, creating the perfect environment for fermentation.
- 1 tbsp yeast (10 grams): Yeast is the magic behind bread rising. It ferments sugars, releasing carbon dioxide that creates air pockets in the dough, resulting in a light, airy texture.
- 4 tsp sugar: Sugar feeds the yeast, speeding up fermentation and adding a subtle sweetness that balances the bread’s flavor.
- 1/3 cup vegetable oil (60 ml): Oil adds moisture and tenderness to the bread, helping to keep it soft longer.
- 1 cup warm milk (200 ml): Milk enriches the dough, giving the bread a tender crumb and enhancing flavor and color. The warmth also assists yeast activation.
- 1/2 tsp salt: Salt controls yeast activity, strengthens gluten, and adds flavor.
- 5 cups flour (600 gr) + ~30-50 gr extra: Flour forms the structure of the bread. The extra is to adjust dough consistency during kneading.
- 100 gr butter: Butter enriches the dough with fat, yielding a soft, flavorful crumb and a deliciously rich aroma.
Step-by-Step Bread Preparation Guide
1. Preparing the Yeast Mixture
Begin by dissolving the sugar into the warm water (around 38-43°C or 100-110°F is ideal; warm but not hot). Sprinkle the yeast over the surface. Let it sit for 5-10 minutes until the yeast becomes frothy and bubbly. This “proofing” confirms that the yeast is active and ready to work.
Tip: If your yeast doesn’t foam, it may be expired or the water too hot/cold. Start over with fresh yeast.
2. Mixing the Dough
In a large mixing bowl, combine the warm milk, vegetable oil, and salt. Pour in the activated yeast mixture once it’s bubbly. Gradually add the flour, about one cup at a time, mixing with a wooden spoon or spatula. The dough will start sticky and shaggy—that’s normal.
3. Kneading
Lightly flour your work surface with a bit of the extra flour. Turn the dough onto the surface. Knead it by hand for about 10 minutes, adding flour as needed to keep it from sticking but being careful not to add too much (which can make the bread dense). The dough should become smooth, elastic, and slightly tacky to the touch.
Tip: Kneading develops gluten, which traps gas bubbles and gives the bread its structure and chewiness.
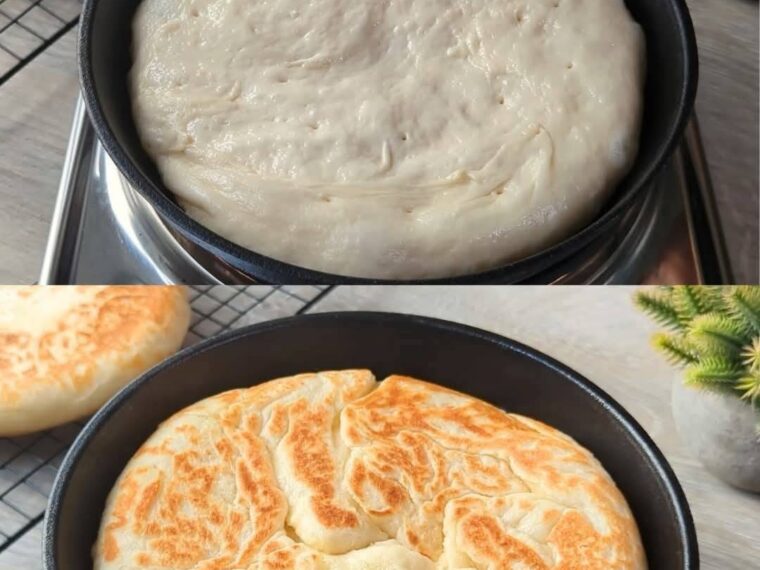
4. First Rise (Bulk Fermentation)
Lightly grease a clean bowl with vegetable oil or butter. Place the kneaded dough inside and cover it with a clean kitchen towel or plastic wrap. Let it rise in a warm, draft-free area for about 1 to 1.5 hours or until it doubles in size.
Tip: Ideal rising temperature is around 25-30°C (77-86°F). You can place the bowl inside an oven with just the light on.
5. Shaping the Dough
Once the dough has doubled, punch it down gently to release excess gas. Transfer it back to your floured surface. Knead lightly to shape it into a loaf or divide it into smaller portions for rolls or buns.
6. Adding Butter
At this stage, incorporate the 100 grams of softened butter into the dough. You can fold it in by hand, kneading gently until evenly distributed. This addition enriches the bread, making it tender and flavorful.
7. Second Rise (Proofing)
Place the shaped dough in a greased baking pan or on a lined baking sheet. Cover it again and let it rise for 30-45 minutes until it puffs up noticeably.
8. Baking
Preheat your oven to 180°C (350°F). Bake the bread for approximately 25-30 minutes or until the crust turns a beautiful golden brown and the loaf sounds hollow when tapped at the bottom.
Tip: For an extra-crispy crust, place a shallow pan of water in the oven during baking to create steam.
9. Cooling
Once baked, transfer the bread onto a wire rack to cool completely before slicing. This allows moisture to redistribute evenly, resulting in a perfect crumb.
Tips for the Perfect Breakfast Bread Every Time
- Use fresh yeast: Active yeast ensures proper rising.
- Measure flour properly: Spoon flour lightly into your measuring cup and level it off rather than scooping directly.
- Warm liquids carefully: Too hot can kill yeast; too cold slows fermentation.
- Don’t rush the rising: Letting the dough rise fully ensures better texture and flavor.
- Experiment with add-ins: Try adding herbs, seeds, or nuts for variety.
- Store properly: Wrap cooled bread in a clean cloth or paper bag for short-term storage. For longer, freeze slices.
Why Make Your Own Bread for Breakfast?
Freshly baked bread is a joy and a symbol of care in the kitchen. Compared to store-bought bread, homemade bread:
- Has no preservatives or additives.
- Offers superior taste and aroma.
- Can be customized to your dietary preferences.
- Is economical and rewarding to make.
Pair your homemade bread with butter, jam, honey, eggs, or cheese for a hearty breakfast that will fuel your day beautifully.
Final Thoughts
This bread recipe is a perfect blend of tradition, simplicity, and deliciousness. Years of experience have shown it to be reliable, forgiving, and rewarding for bakers of all levels. With basic ingredients, minimal effort, and a little patience, you can wake up to the smell of freshly baked bread that never fails to impress.
Ready to try it out? Gather your ingredients, follow the steps, and enjoy the comforting magic of homemade bread every morning!