Cardamom, often referred to as the “queen of spices,” is a highly aromatic and flavorful spice that is widely used in cooking, baking, and even traditional medicine. Its exotic aroma and complex flavor profile make it a prized ingredient, but did you know that you can grow cardamom right at home? Growing cardamom in a container is a great way to enjoy this spice fresh from your garden, especially if you live in a climate that may not be ideal for outdoor cultivation. With a little patience and care, you can have your very own cardamom plant thriving in a container right on your balcony, patio, or windowsill.
In this comprehensive, step-by-step guide, we’ll show you how to successfully grow cardamom at home in a container. From choosing the right plant to harvesting the pods, this guide will cover everything you need to know to start growing this unique and fragrant plant.
Why Grow Cardamom at Home?
1. Fresh and Flavorful Spice
Growing cardamom at home ensures that you have access to the freshest spice possible. Homegrown cardamom is more aromatic and flavorful than store-bought options, which often lose their potency over time.
2. Beautiful Plant for Indoors
Cardamom plants are lush, tropical plants with beautiful foliage that can also serve as an ornamental addition to your home. Their glossy, dark green leaves and delicate white or yellowish flowers make them an attractive feature in any indoor garden.
3. Affordable and Convenient
By growing cardamom at home, you can save money on purchasing the spice from the store. Plus, you’ll have a steady supply of fresh pods for your cooking, baking, or making cardamom-infused teas.
Choosing the Right Container for Cardamom
Cardamom is a tropical plant that thrives in warm and humid conditions, so you need to select a container that provides these conditions. It’s important to choose a wide, deep container to accommodate the plant’s root system, as cardamom grows in rhizomes that can spread out.
What to Look for in a Container:
- Size: Choose a container that is at least 12-14 inches deep and wide enough to allow for root growth. A larger pot will give the plant more space to grow and increase your chances of a bountiful harvest.
- Drainage: Ensure that the container has drainage holes at the bottom to prevent waterlogging, which could lead to root rot. You can also use a saucer underneath to catch excess water.
- Material: Plastic or terracotta pots work well. Plastic pots are lightweight and help retain moisture, while terracotta allows for better airflow to the roots.
How to Choose the Best Spot for Your Container:
Cardamom plants prefer bright, indirect light, so place your container near a window where it gets plenty of light without being exposed to harsh, direct sunlight. If you live in a climate with cold winters, growing cardamom indoors is a great option. If you’re growing it outdoors, make sure it’s in a spot that gets partial shade.
Selecting Cardamom Seeds or Rhizomes
You can grow cardamom from either seeds or rhizomes. However, growing from rhizomes is generally easier and faster, as it’s closer to the plant’s natural growth form.
Buying Seeds:
- If you decide to go the seed route, purchase fresh cardamom seeds from a reliable garden center or online store. Keep in mind that cardamom seeds are slow to germinate, and you may need to be patient as they can take a few weeks to sprout.
- Cardamom seeds should be planted fresh, as their viability declines over time. If possible, choose seeds that are as fresh as possible.
Buying Rhizomes:
- Rhizomes are the underground stems of the cardamom plant, and they are the most common method of growing cardamom at home. You can purchase rhizomes from a nursery, garden center, or online store.
- Look for healthy rhizomes that are firm and plump, free of signs of rot, mold, or disease. Rhizomes can sometimes be found in small, individual clumps, which is ideal for growing new plants.
Planting Cardamom in the Container
Step 1: Preparing the Potting Mix
Cardamom plants prefer rich, well-draining, and slightly acidic soil. You can use a mix of potting soil, coconut coir, and perlite or sand to create the perfect potting mix for cardamom.
Step 2: Planting the Seeds or Rhizomes
- For Seeds: Sow the seeds ½ inch deep into the potting mix. Gently press the soil down around the seeds and water lightly.
- For Rhizomes: Plant the rhizomes 1-2 inches deep in the soil, with the buds facing up. Space the rhizomes a few inches apart to allow for growth.
Once planted, cover the container with a plastic sheet or clear plastic dome to maintain humidity and warmth. Keep the soil consistently moist but not waterlogged. The seeds or rhizomes will begin to sprout after a few weeks.
Step 3: Watering and Moisture
Cardamom plants require regular watering to keep the soil consistently moist, but not soggy. They thrive in a humid environment, so you may want to mist the leaves daily or place the pot on a tray of water with pebbles to increase humidity.
Caring for Your Cardamom Plant
1. Temperature and Humidity
Cardamom plants thrive in warm temperatures between 65-85°F (18-29°C). They also prefer high humidity, typically between 60-80%. If the air in your home is too dry, consider using a humidifier or placing your plant on a moisture tray to boost humidity.
2. Fertilizing
To promote healthy growth, fertilize your cardamom plant regularly. Use a balanced liquid fertilizer every 4-6 weeks during the growing season (spring through summer). During the fall and winter months, you can reduce fertilization since the plant will enter a period of dormancy.
3. Pruning and Maintenance
Cardamom plants grow tall and can become leggy over time. Prune any yellow or damaged leaves to keep the plant looking neat and healthy. You can also cut back any tall stems to encourage a bushier appearance.
4. Pests and Diseases
Cardamom is generally pest-resistant, but it can sometimes be affected by common houseplant pests like aphids, mealybugs, or spider mites. Check your plant regularly for signs of pests and treat with insecticidal soap or neem oil if needed.
Harvesting Cardamom Pods
Cardamom plants take a while to mature. They generally need about 2-3 years to produce their first harvest. The harvest time depends on the variety, as well as environmental conditions.
How to Harvest Cardamom Pods:
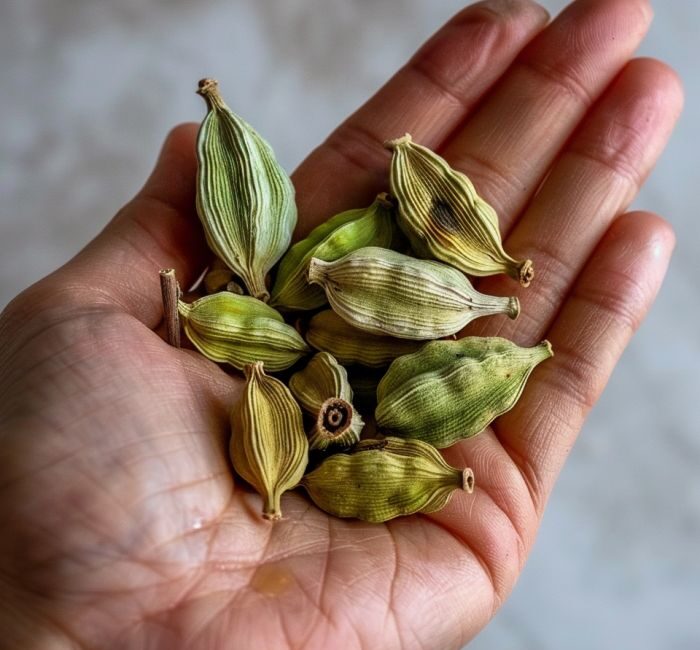
- Cardamom pods are ready for harvest when they turn green or yellowish and begin to split open. This usually happens in the late fall or early winter.
- Gently pull the pods from the plant by hand or use scissors to snip them off the stems.
- Once harvested, allow the pods to dry out in a cool, dry area for a few days before using them.
Common Problems When Growing Cardamom in a Container
1. Leaves Turning Yellow
This could be a sign of overwatering or a nutrient deficiency. Ensure that the plant is getting enough water, but not too much. If you haven’t fertilized in a while, consider adding some balanced fertilizer.
2. Slow Growth or No Germination
If you’re growing cardamom from seeds and notice slow germination or no growth, it could be due to old seeds or the lack of warmth. Ensure your container is kept warm and consistently moist.
3. Root Rot
Root rot can be a problem if the soil is too soggy. Make sure your container has proper drainage, and never let the plant sit in standing water.
Conclusion
Growing cardamom at home in a container is a rewarding experience that can bring the fragrant spice right to your kitchen. While it takes a little time and patience, the end result is well worth it. By following this step-by-step guide, you can successfully grow cardamom in your own home, whether you’re cultivating it indoors or on a balcony. Not only will you have a constant supply of fresh cardamom pods, but you’ll also enjoy the beauty of this tropical plant and the satisfaction of growing something special.
Give it a try, and soon you’ll be enjoying your very own homegrown cardamom in your culinary creations!