Few desserts evoke the warmth and comfort of home quite like a rich, creamy custard. The smooth, velvety texture and delicate vanilla flavor transport you straight back to grandma’s kitchen, where sweet aromas filled the air and every bite was made with love. Whether served warm or chilled, as a standalone treat or as a base for other desserts, this classic custard is a must-try!
In this detailed guide, we’ll walk you through step-by-step instructions, common pitfalls, and pro tips to ensure your custard turns out perfectly silky every time.
Why You’ll Love This Recipe ❤️
✅ Incredibly Creamy Texture – Silky-smooth and lusciously rich.
✅ Simple Ingredients – Just a handful of pantry staples.
✅ Nostalgic Flavor – Classic vanilla custard like grandma used to make.
✅ Versatile – Serve it warm, cold, as a filling, or on its own.
✅ Make-Ahead Friendly – Stores beautifully for a few days.
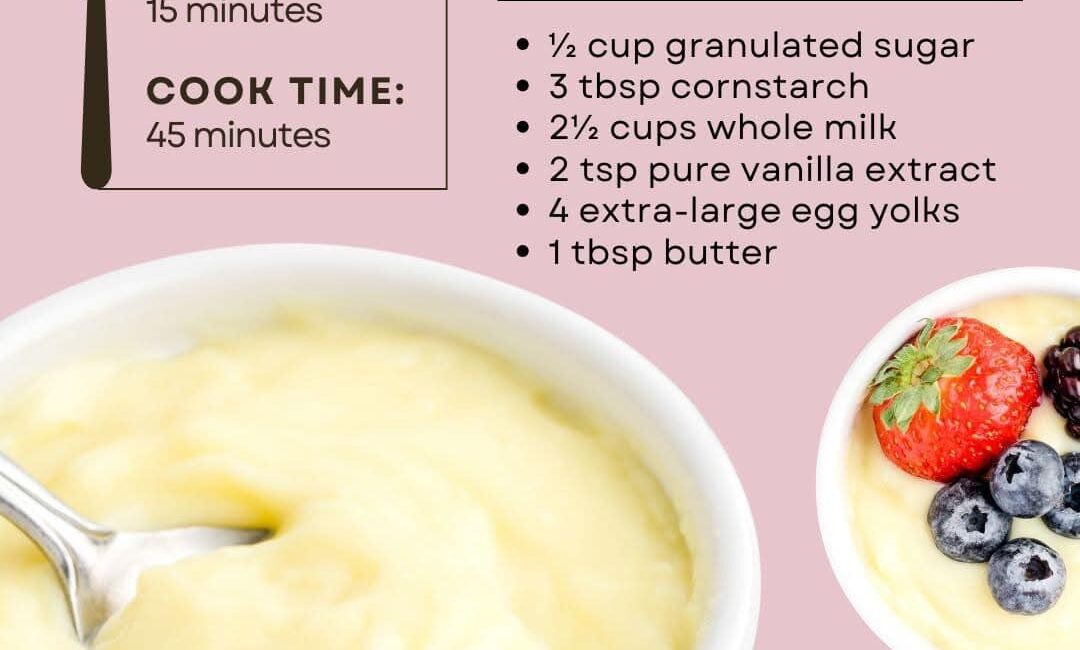
Ingredients You’ll Need 🥄
- ½ cup granulated sugar (for sweetness and smoothness)
- 2 tablespoons granulated sugar (for additional balance)
- 3 tablespoons cornstarch (for thickening)
- 2½ cups whole milk (for richness; avoid low-fat milk)
- 2 teaspoons pure vanilla extract (for flavor depth)
- 4 extra-large egg yolks or 3 jumbo egg yolks (room temperature, slightly beaten) – These provide richness and structure.
- 1 tablespoon salted sweet cream butter (adds silkiness and enhances flavor)
Step-by-Step Instructions 📖
Step 1: Prepare Your Ingredients
- Separate the egg yolks and let them come to room temperature (this helps prevent curdling).
- Measure all your ingredients ahead of time for a smooth cooking process.
Step 2: Combine the Dry Ingredients
- In a medium saucepan, whisk together:
- ½ cup granulated sugar
- 2 tablespoons additional sugar
- 3 tablespoons cornstarch
- Why do this first? Dry ingredients should be evenly mixed before adding liquid to avoid lumps.
Step 3: Add the Milk & Heat Slowly
- Gradually whisk in 2½ cups whole milk to the sugar mixture.
- Place the saucepan over medium heat and stir constantly to prevent scorching.
- Pro Tip: Use a heavy-bottomed saucepan for even heat distribution.
Step 4: Temper the Egg Yolks
Tempering prevents the eggs from scrambling when added to the hot liquid.
1️⃣ In a separate bowl, whisk the room-temperature egg yolks.
2️⃣ Slowly pour about ½ cup of the warm milk mixture into the yolks, whisking continuously.
3️⃣ Gradually add this tempered yolk mixture back into the saucepan.
4️⃣ Keep stirring! This is crucial to maintain a smooth custard.
Step 5: Thicken the Custard
- Continue cooking over medium heat, whisking constantly, until the custard thickens and coats the back of a spoon (this usually takes 4-6 minutes).
- Test for doneness: Dip a spoon into the custard and run your finger across the back—if the line stays clean, it’s ready!
Step 6: Finish with Vanilla & Butter
- Remove the saucepan from heat.
- Stir in 2 teaspoons vanilla extract and 1 tablespoon butter for a luxuriously smooth texture.
Step 7: Strain for a Perfectly Smooth Custard
- If needed, strain through a fine-mesh sieve to remove any cooked egg bits for an ultra-silky texture.
Step 8: Chill or Serve Warm
- For warm custard: Let it sit for 5 minutes and serve immediately.
- For chilled custard: Cover with plastic wrap (pressing it directly onto the surface to prevent a skin from forming) and refrigerate for at least 2 hours.
Common Custard Mistakes & How to Fix Them 🛑
🚫 Scrambled Eggs? – The eggs were added too quickly or the heat was too high. Always temper the eggs slowly and use medium heat.
🚫 Lumpy Custard? – The mixture wasn’t stirred consistently. Whisk constantly and strain if needed.
🚫 Too Thin? – The custard wasn’t cooked long enough. Continue stirring and cooking until it thickens.
🚫 Too Thick? – Too much cornstarch was used. Use precise measurements to ensure the perfect consistency.
Serving Ideas & Variations 🍮
🍓 Classic Custard Variations
🔥 Caramelized Custard – Sprinkle with sugar and torch it for a crème brûlée effect.
🍫 Chocolate Custard – Stir in ½ cup melted chocolate for a decadent twist.
☕ Coffee Custard – Add 1 teaspoon espresso powder for a rich flavor.
🥄 How to Serve
- As a simple dessert – Just top with cinnamon or nutmeg.
- With fresh fruit – Serve with berries, bananas, or poached pears.
- As a filling – Use in cream puffs, cakes, or pies.
- Over pancakes or waffles – A dreamy breakfast topping!
How to Store & Make Ahead 🕰️
Refrigeration – Store in an airtight container for up to 3 days.
Freezing – Not recommended, as it can become grainy.
Reheating – Gently warm over low heat, stirring frequently.
Final Thoughts: A Spoonful of Nostalgia
This creamy homemade custard is more than just a dessert—it’s a trip down memory lane. With its silky-smooth texture, rich vanilla flavor, and comforting warmth, it’s the perfect treat to bring back childhood memories.
So, grab your spoon, close your eyes, and let one bite transport you back to grandma’s kitchen! 🍮✨
Who’s ready for a taste? ✋ Let us know how your custard turns out! 🥄❤️