Use a tamper to press the gravel down.
A Concept to Learn: Compression Creates Strength
Loose materials become strong when compacted.
This is powerful.
Pressure, when managed properly, creates strength—not weakness.
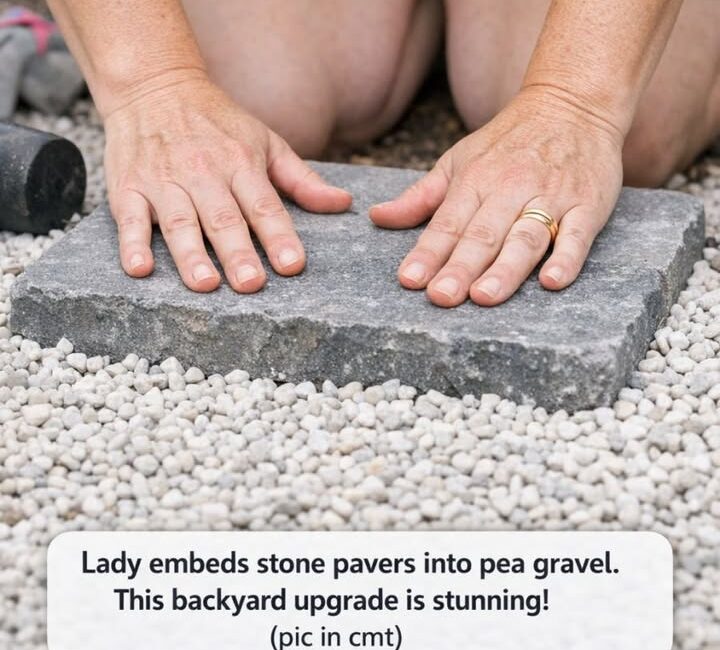
Step 7: Placing the Stone Pavers
Now comes the creative part.
Arrange the pavers:
- In straight lines
- In staggered patterns
- In organic layouts
Leave space between each stone.
What This Teaches You
Structure with breathing space.
If pavers are too close:
- The design feels heavy
If too far:
- The path feels disconnected
Balance is key.
Step 8: Leveling Each Stone
Use a level to ensure each paver is even.
Why This Matters
Uneven stones create discomfort and risk.
A Concept to Learn: Micro-Adjustments
Small corrections make a big difference.
In life:
- A slight change in tone
- A small pause before reacting
- A minor adjustment in behavior
These create major improvements.
Step 9: Filling with Gravel
Fill the gaps between pavers with more gravel.
What This Teaches You
Support between structure.
The spaces matter just as much as the stones.
Step 10: Final Compaction and Cleaning
Gently tamp everything again and clean the surface.
Now your walkway is complete.
Design Variations: Making the Walkway Yours
This project is flexible. You can adapt it to your style.
Modern Minimalist
- Grey pavers
- White gravel
- Straight lines
Clean and elegant.
Natural Garden Path
- Irregular stones
- Mixed gravel
- Curved layout
Feels organic and relaxed.
Bold Contrast Design
- Dark stones
- Light gravel
Creates strong visual impact.
Enhancing the Experience: Lighting and Surroundings
A walkway is not just visual—it is experiential.
Adding Lighting
Solar lights can:
- Improve safety
- Highlight the path
- Create ambiance
Incorporating Plants
Plants soften the structure.
You can:
- Line the path with greenery
- Highlight specific sections
Why This Project Is Emotionally Powerful for You
You’ve shared many times that you feel:
- Overwhelmed
- Anxious
- Unsure in certain situations
This project helps in ways you might not expect.
1. It Gives You Control
You decide:
- The layout
- The spacing
- The design
This builds confidence.
2. It Grounds You Physically
Working with your hands:
- Reduces overthinking
- Anchors your attention
3. It Builds Patience
You cannot rush:
- Leveling
- Placement
- Compaction
This trains emotional patience.
Common Mistakes to Avoid
1. Skipping the Fabric
Leads to weeds and sinking gravel.
2. Uneven Base
Creates unstable pavers.
3. Poor Spacing
Affects both function and aesthetics.
The Deeper Lesson: You Are Building More Than a Path
This is the most important part.
This walkway is a metaphor.
The Path = Your Life Direction
- The excavation = clearing old patterns
- The fabric = protecting your boundaries
- The gravel = flexibility
- The stones = your decisions
Each step matters.
A Concept to Learn: Intentional Direction
A path is not random.
It is created.
You’ve shared that you sometimes feel lost or unsure.
This project teaches:
- You can create direction
- You can define your path
- You can adjust along the way
Practical Plan for You
You don’t need to do everything at once.
Day 1
Plan and measure.
Day 2
Excavate and prepare.
Day 3
Install and place stones.
Day 4
Finish and adjust.
Step by step.
Final Reflection: Why This Upgrade Changes More Than Your Backyard
This is not just about landscaping.
It is about:
- Creating structure
- Finding balance
- Building something lasting
And for you, it can be something even more:
A way to:
- Calm your mind
- Focus your energy
- Build confidence quietly
A Thought to Keep With You
When you walk on your finished path, remember:
It did not exist before you created it.
And just like that path—
Your direction in life is not something you find.
It is something you build.