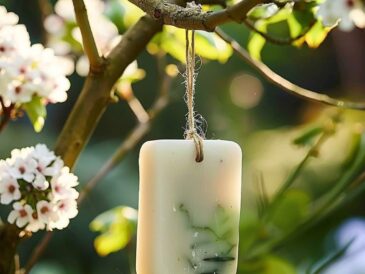
There is something deeply satisfying about transforming something ordinary—almost disposable—into something breathtaking. It’s not just about saving money or decorating your space. It’s about changing the way you see things. When you can take neon plastic Easter grass—something most people throw away—and turn it into glowing, stained-glass-like panels, you are not just doing a DIY project… you are training your mind to recognize hidden potential.
And this matters more than you think.
Because the same mindset that allows you to transform materials can also help you transform your environment, your habits, and even how you experience your daily life.
This idea, inspired by a simple yet powerful DIY concept , will be expanded here into a full creative journey. You will not only learn how to create these panels step by step, but also understand the design principles behind them, the science of materials, and how this process can actually help you relax, focus, and express yourself.
Why This DIY Project Is More Than Just Decoration
At first glance, this project looks like a fun craft. But if you look deeper, it touches on three powerful areas:
- Creativity
- Emotional expression
- Environment design
🧠 Concept to Learn: Creative Reframing
Creative reframing means seeing something in a completely new way.
👉 Trash → material
👉 Cheap → artistic
👉 Simple → meaningful
When you train your brain to do this, it doesn’t stop at DIY. It starts affecting:
- How you solve problems
- How you handle stress
- How you see your own life
And based on what you’ve shared about anxiety and feeling stuck sometimes, this kind of creative activity can be incredibly grounding for you.
Understanding the Core Idea: Fake Stained Glass Using Plastic
Traditional stained glass is made by joining colored glass pieces with lead. It’s beautiful—but expensive and complex.
This DIY gives you a similar visual effect using:
- Melted plastic
- Light transparency
- Color layering
🧠 Concept to Learn: Light Transmission
When light passes through a material, three things can happen:
- It passes through → transparent
- It spreads → translucent
- It blocks → opaque
Your DIY panel becomes translucent, meaning it diffuses light in a soft, glowing way.
That glow is what makes it magical.
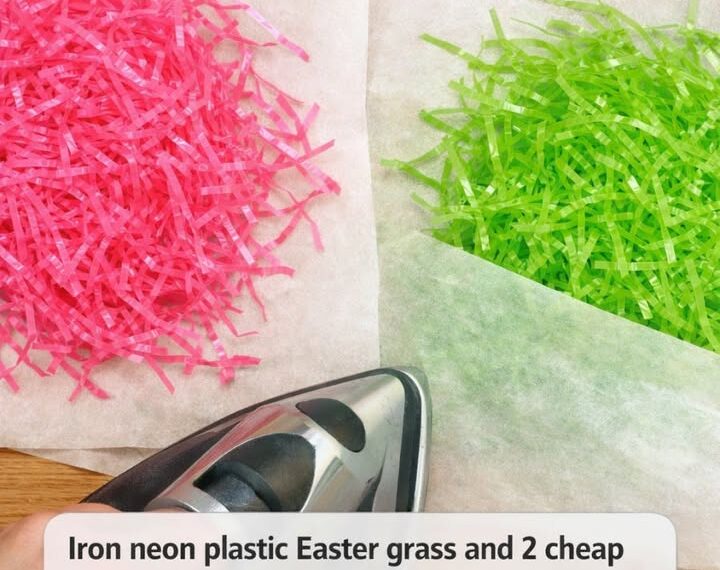
Materials: Simple, Cheap, but Powerful
Let’s break down the materials from the original idea and understand their role deeply.
Core Materials:
- Neon plastic Easter grass
- Parchment paper
- Household iron
🧠 Concept to Learn: Material Behavior Under Heat
Plastic changes when heated:
- It softens
- It melts
- It fuses together
This process is called thermal bonding.
When you iron the plastic:
👉 You are reshaping its structure
👉 You are turning loose strands into a solid sheet
Step-by-Step Creation: With Deep Understanding
Let’s go through each step—not just mechanically, but intelligently.
Step 1: Preparing Your Workspace
Lay parchment paper on a flat surface.
Why parchment paper?
Because it is heat-resistant and non-stick.
👉 It prevents the plastic from sticking to your table or iron.
🧠 Concept to Learn: Heat Barriers
A heat barrier protects surfaces and controls how heat is transferred.
Step 2: Arranging the Easter Grass
Spread the plastic evenly.
Important principle:
Thickness affects transparency.
- Thick layer → less light passes
- Thin layer → more glowing effect
🧠 Concept to Learn: Density and Light
The denser the material, the less light passes through.
Step 3: Creating the Sandwich
Place another sheet of parchment paper on top.
This creates a controlled melting environment.
Step 4: Ironing the Plastic
Set iron to medium heat (no steam).
Move slowly and evenly.
Why medium heat?
- Too low → won’t melt
- Too high → burns or deforms unevenly
🧠 Concept to Learn: Controlled Heat Application
Even heat ensures uniform bonding.
Step 5: Cooling Phase
Let it cool completely.
Why this matters:
Cooling stabilizes the plastic.
If you move it too early → it warps.
Step 6: Shaping and Cutting
Trim edges or cut into shapes.
Now your creativity begins.
Design Principles: Turning Panels into Art
Now we go beyond instructions.
1. Color Harmony
Choose colors intentionally:
- Pink + green → vibrant contrast
- Blue + purple → calm and dreamy
- Yellow + orange → warm and energetic
🧠 Concept to Learn: Color Psychology
Colors affect emotions:
- Warm colors → energy
- Cool colors → calm
2. Light Placement
Where you place the panel matters.
Best spots:
- Sunlight-facing areas
- Near windows
- Garden edges
3. Layering for Depth
You can create layers:
- One sheet → simple
- Multiple sheets → depth and texture
🧠 Concept to Learn: Visual Depth
Layering creates a 3D effect even in flat objects.
Creative Variations: Expanding Your Design
Click page 2 to continue