Cleaning the shutters in your home is one of those tasks that seems simple but often leads to frustration. You know the drill: as soon as you start wiping down the slats, dust seems to go everywhere. It settles back onto the floors, furniture, or other surfaces, requiring you to clean everything all over again. The process can feel endless, time-consuming, and messy. But it doesn’t have to be this way!
In this comprehensive guide, we’ll explore how to clean your shutters efficiently without spreading dust everywhere. We’ll cover a variety of methods—some quick and easy, others more detailed and thorough—that will help you achieve sparkling clean shutters while keeping your home free of dust clouds. Whether you’re tackling wooden, vinyl, aluminum, or plastic shutters, you’ll find practical tips, time-saving hacks, and effective strategies to streamline this household chore.
Why Shutters Collect So Much Dust
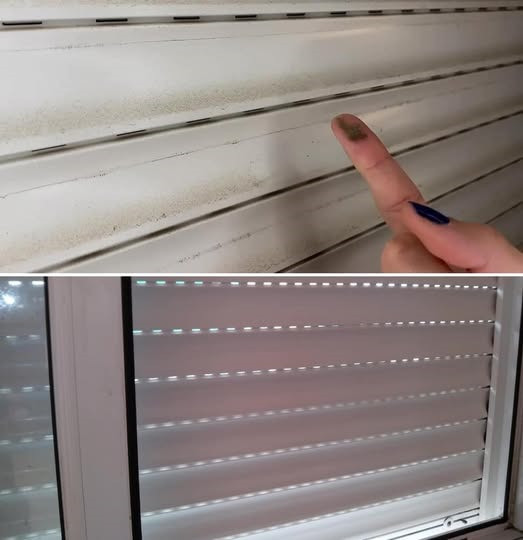
Before diving into the cleaning methods, it’s essential to understand why shutters accumulate so much dust. Unlike flat surfaces like tables or countertops, shutters have multiple slats that can catch dust from every direction. These slats are typically spaced close together, which means the dust settles between them, making it difficult to clean. Additionally, window air currents and even opening and closing the shutters can cause dust and debris to be stirred up and trapped inside.
Common culprits for dust buildup include:
- Air movement in the home (HVAC systems, open windows).
- Pollens and other allergens.
- Poor ventilation in the room, making it harder for the dust to escape.
- Textiles and fabrics in the room (curtains, furniture) that shed fibers.
How to Clean Shutters Without Spreading Dust Everywhere: The Ultra-Quick Method
Now, let’s jump into the good stuff! Here’s the ultimate guide to cleaning your shutters without scattering dust all over your home. This method is efficient, time-saving, and, most importantly, it avoids making a mess.
Step 1: Prepare Your Supplies
You won’t need many supplies for this process, but having the right tools on hand will make your job easier and quicker. Here’s what you’ll need:
- Microfiber Cloths: These are key to trapping dust rather than just moving it around.
- Feather Duster or Slat Brush: These tools are great for getting into those narrow slats without disturbing the dust.
- Vacuum with a Brush Attachment: This will help you vacuum away dust that has already settled between the slats, without disturbing it too much.
- All-Purpose Cleaner or Wood Cleaner (depending on the material of your shutters).
- Spray Bottle with Water and a Touch of Dish Soap: A DIY solution to clean the slats.
- Towels or a Drop Cloth: These will catch any dust that falls from the shutters.
Step 2: Dust First, Vacuum Second
While it might seem intuitive to vacuum first, it’s best to dust the shutters first and vacuum after to catch the debris that falls. Follow this sequence for the best results:
- Start at the Top: Begin cleaning the shutters from the top slat, working your way downward. Dust naturally falls from higher surfaces, so cleaning in this order ensures that the lower slats don’t get dusted again once you finish.
- Use a Feather Duster or Slat Brush: Gently run the feather duster or brush along each slat to dislodge the dust. The advantage of using a feather duster or a slat brush is that it captures dust without scattering it around the room. If you don’t have a brush, you can use a microfiber cloth wrapped around your hand, but the brush works better for precision.
- Be Gentle: Don’t press too hard on the slats; instead, use soft strokes to dislodge dust without damaging the shutter material.
- Catch the Falling Dust: Lay a towel or drop cloth beneath the shutters to catch any falling dust. This will help you avoid a mess and minimize the need for extra cleaning afterward.
Step 3: Vacuum the Dust That’s Fallen
Once you’ve dusted the slats, it’s time to vacuum. The vacuum’s suction power will catch any dust that has fallen between the slats or onto the floor. Make sure you use the brush attachment to prevent scratching the shutters.
- Vacuum the Entire Area: Run the vacuum along the base of the shutters to pick up any dust that has fallen onto the floor, as well as any loose dust that might have settled in between the slats.
- Use Short, Controlled Movements: Instead of sweeping the vacuum across a large area, focus on small sections and move slowly to ensure the vacuum picks up all the debris.
Step 4: Wipe Down the Slats (Optional)
Now that most of the dust is gone, you can finish the job by giving your shutters a light wipe down. This step helps remove any remaining dust, fingerprints, or grime. Depending on the material of your shutters, choose the appropriate cleaning solution:
- For wooden shutters, use a mild wood cleaner or a mix of water and vinegar.
- For vinyl, aluminum, or plastic shutters, you can use an all-purpose cleaner or a mixture of water and dish soap.
To wipe down the shutters:
- Spray the Cloth (Not the Shutters): Never spray the cleaner directly onto the shutters, as it can cause streaks or damage the surface. Instead, spray a small amount of your cleaner onto a microfiber cloth.
- Wipe Each Slat: Gently wipe down each slat using the microfiber cloth. Again, work from top to bottom to avoid dirtying areas that you’ve already cleaned.
- Buff Dry: If any cleaning solution is left behind, buff the surface with a dry cloth to ensure that no streaks or residue remain.
Step 5: Clean the Tracks and Corners
One often overlooked part of cleaning shutters is the tracks and corners. These areas are prone to dust buildup, and if neglected, can affect the function of the shutters. Here’s how to clean them:
- Use a Vacuum Attachment: Use the brush attachment to carefully clean the tracks where the shutter mechanism slides. This will remove any dust or grime buildup.
- Use a Small Brush or Toothbrush: A small, soft brush can reach deep into corners and narrow spaces where dust tends to accumulate.
- Wipe the Tracks: After vacuuming, wipe down the tracks with a damp cloth to remove any remaining debris.
Step 6: Regular Maintenance
Once you’ve cleaned your shutters, keeping them clean is all about regular maintenance. By incorporating a simple, weekly routine, you can prevent dust from accumulating and avoid the need for deep cleaning sessions. Here are a few maintenance tips:
- Dust Every Week: Use a microfiber cloth or feather duster to quickly go over the slats of your shutters once a week. A quick dusting can prevent dust from accumulating, making deep cleanings much less necessary.
click page 2 to continue